Click on the thumbnails for the full sized picture.
The trailer project begins. 2/3/2008
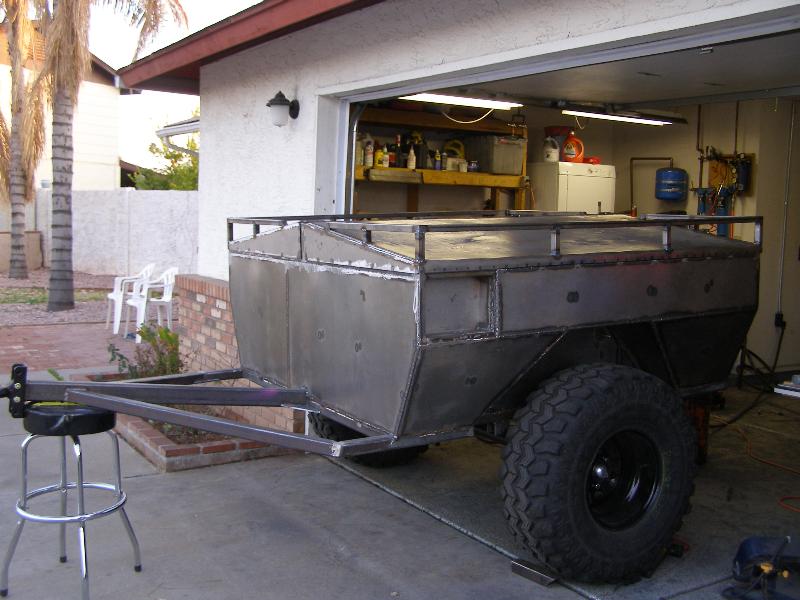
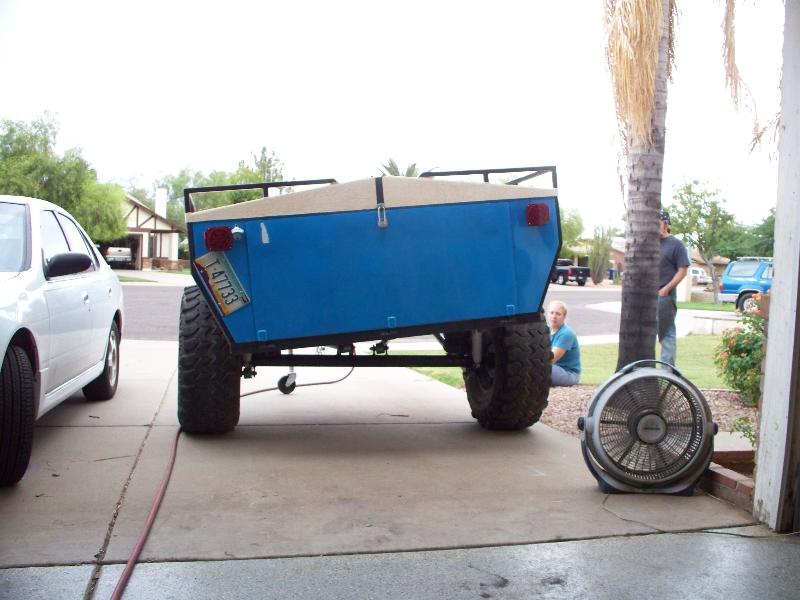
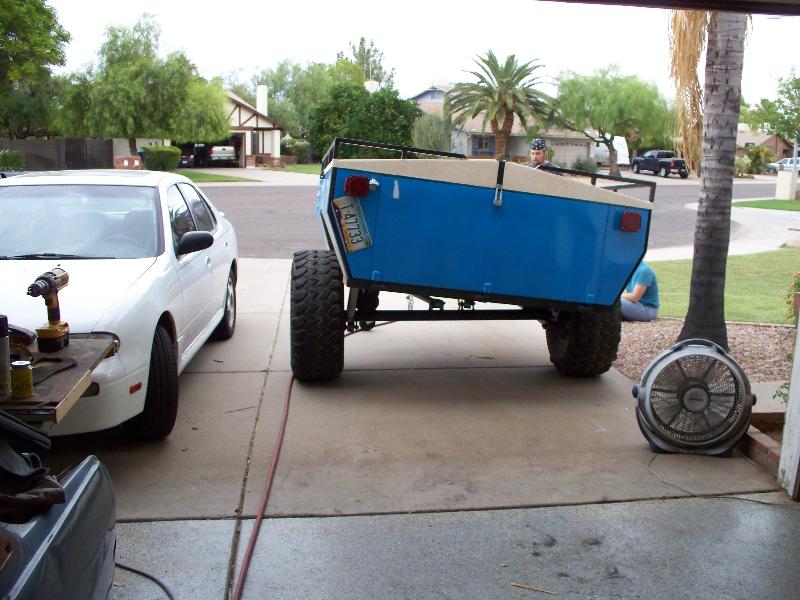
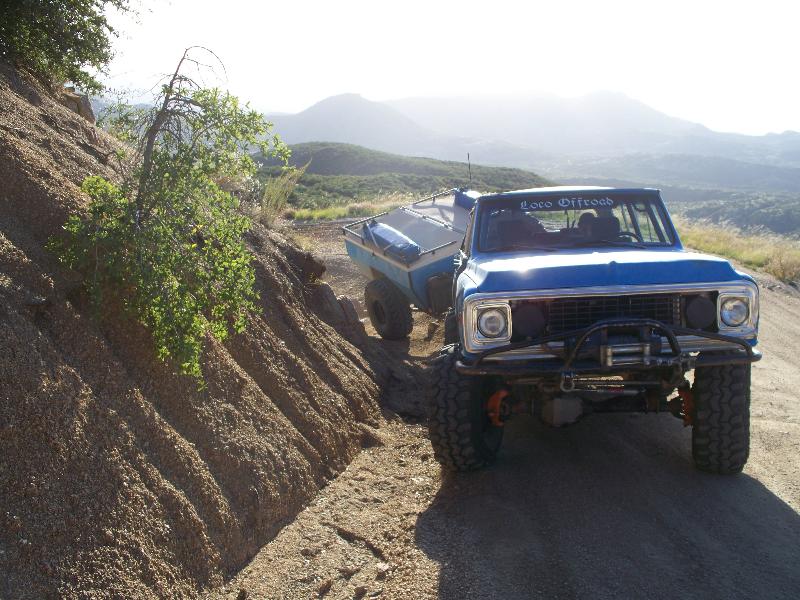
The Arizona Run this year is going to be crazy, every night we will be camping somewhere different. We won't be stopping for gas or supplies until the 4th day. In order for me to take my family and supplies I have to have some way to carry fuel and supplies for 3 people for 4 days with me. I built a roof rack for the truck that holds quite a bit, however the truck does not wheel very well when it's loaded down with 500 lbs of crap, plus I wouldn't have enough space for everything I need (20 gallons of gas, 20 gallons of water, ice chests, tents etc.) so I decided I needed to make an off-road trailer.
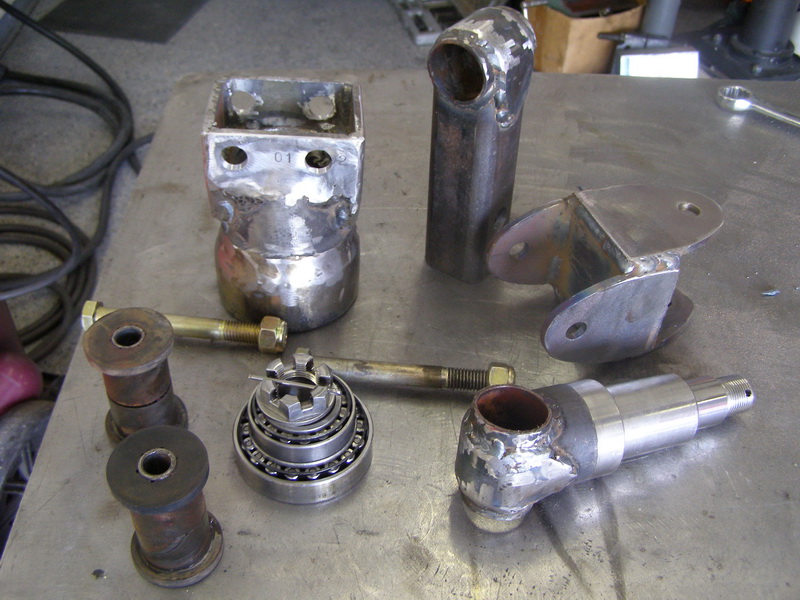
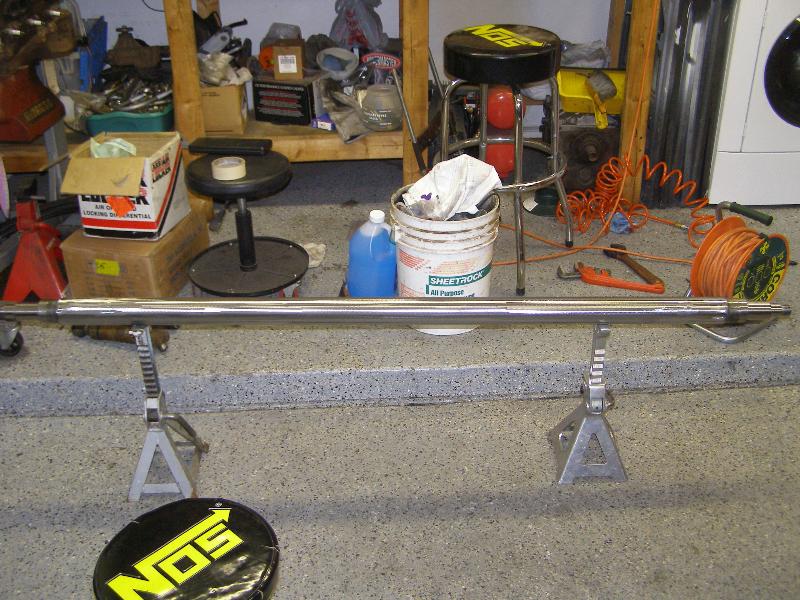
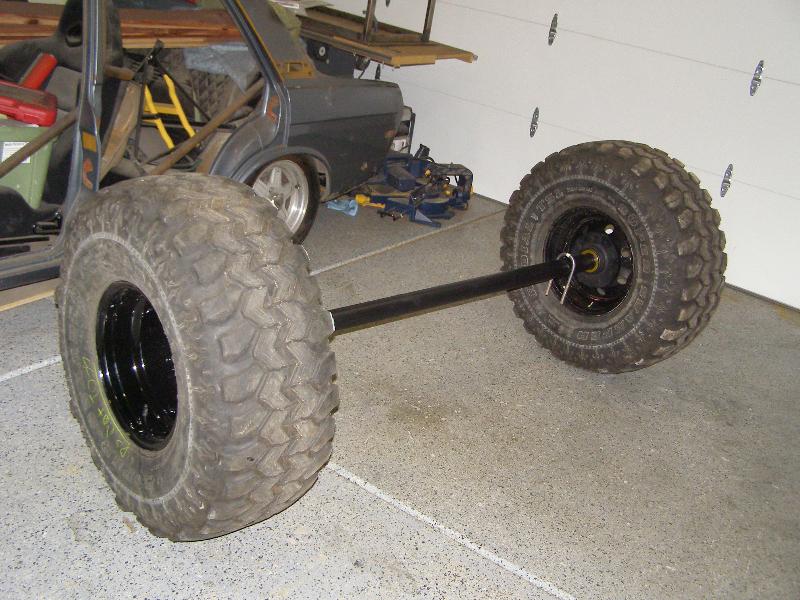
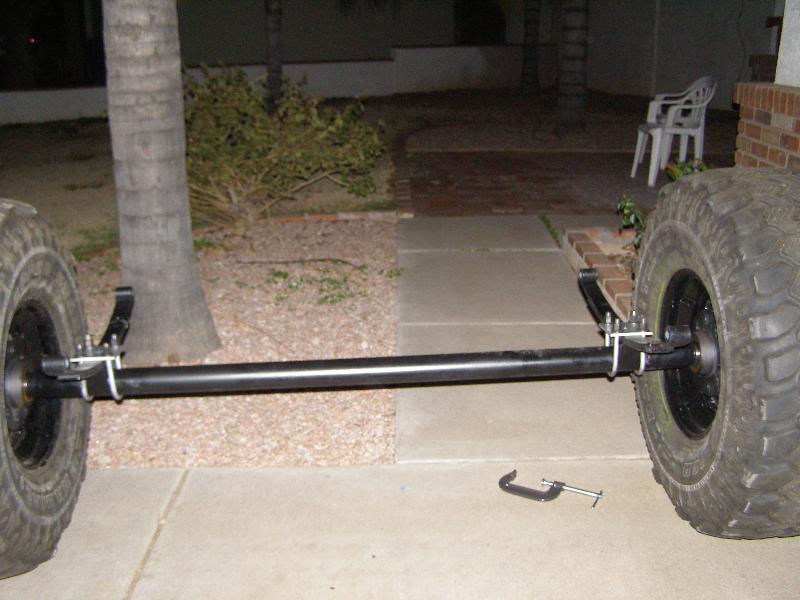
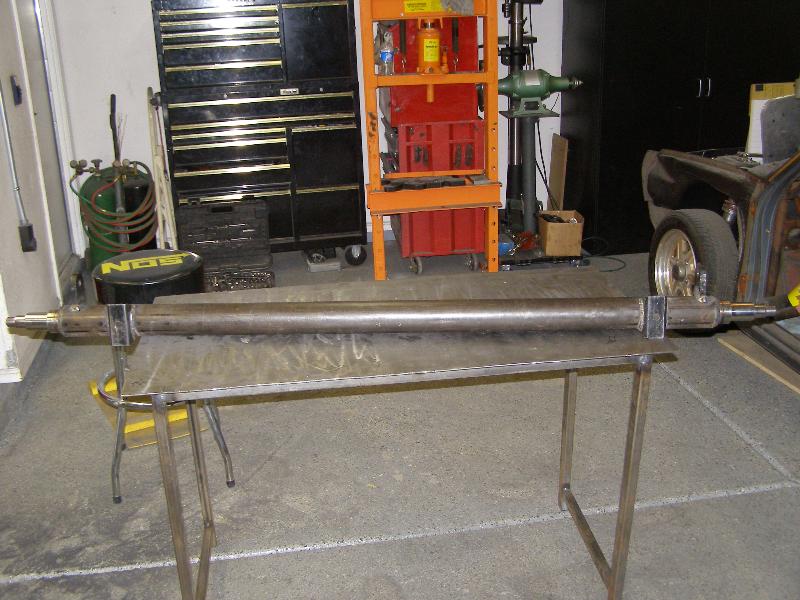
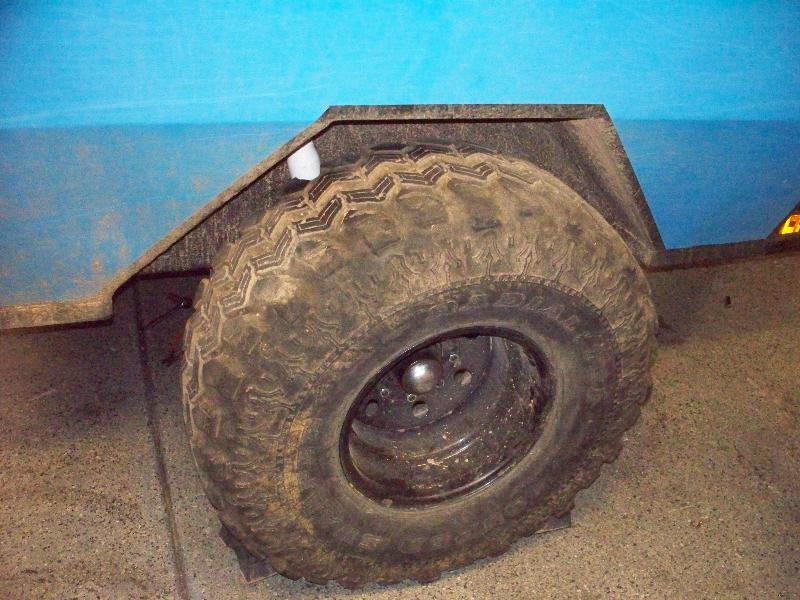
I started with my old 35" Super Swamper SSR's. I don't want to carry a separate spare for the trailer so I want the tire size and wheels to be the same on the truck and trailer. I picked up some spindles, 8 lug hub assemblies, leaf springs, trailer lights and a spring mount kit from Southwest Wheel. I welded the spindles into a 2.5" 1/8 wall tube, assembled the hubs and bolted on the wheels.
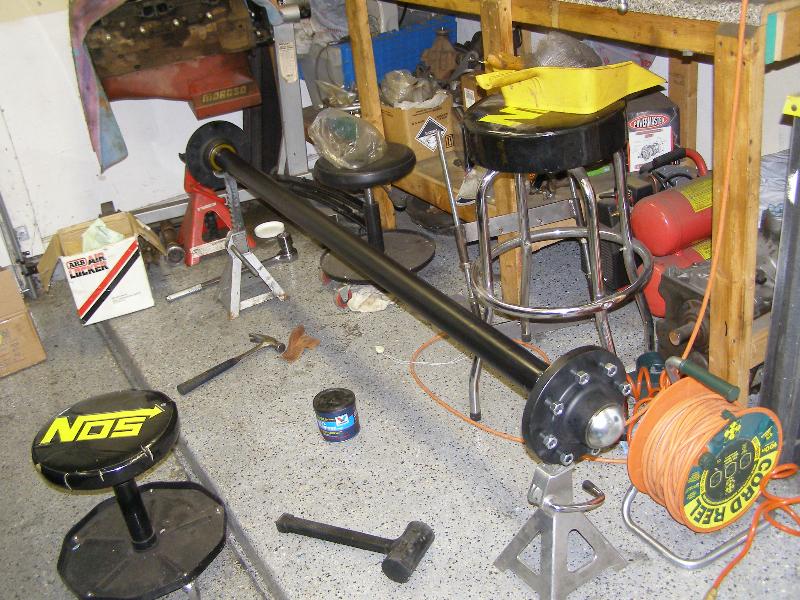
Amber and Justin fabricated some spring perches and plates, I welded on the perches, sprayed some paint and we bolted the springs onto the axle.
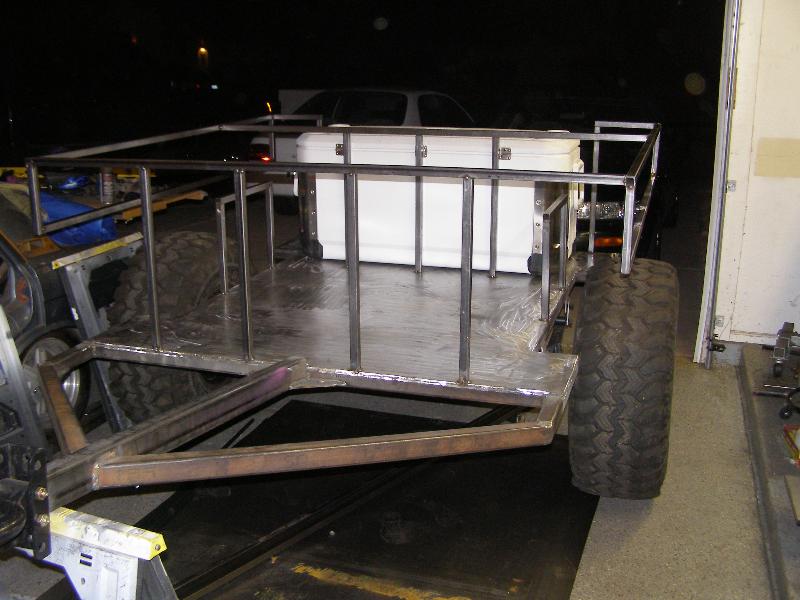
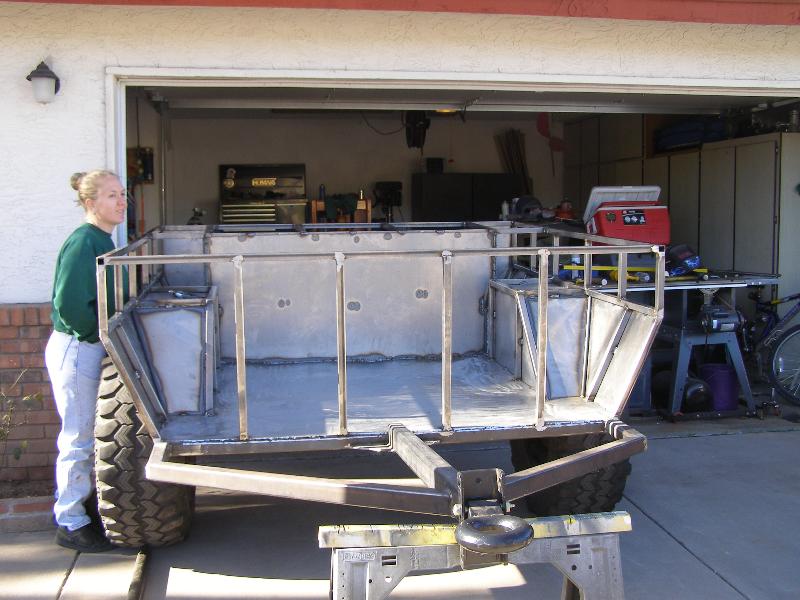
Saturday I picked up a load of steel from Industrial Metal Supply. I had picked up some 2x2 and 2x3 tubing earlier so I just got 14 gauge sheet metal and 1x1 square tubing. I made the outer frame with 2x2 tubing (1/4 wall for the front and rear "bumpers" and 1/8 wall for the sides) and braced it with 1x1 tubing in the middle. The tongue of the trailer was made with a 2x3 1/4 wall tube I had left over from another project.
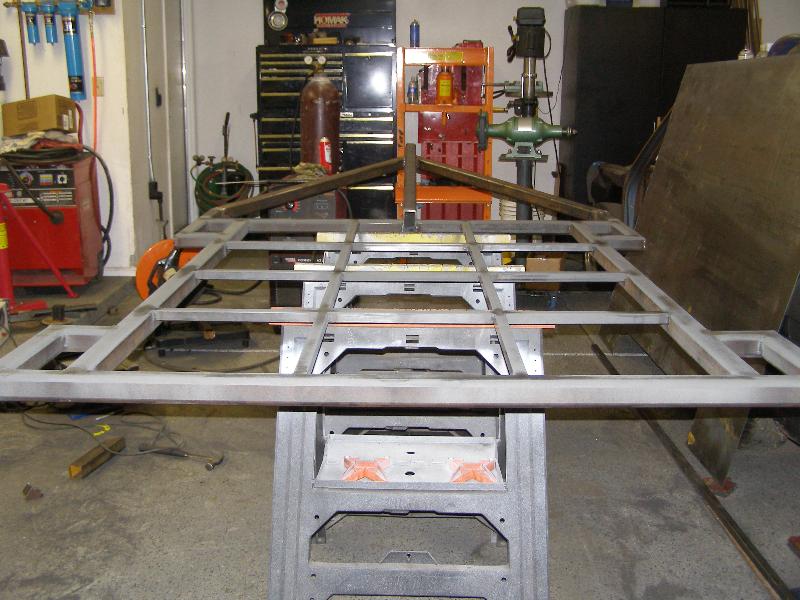
With the frame completed I welded on a base plate of 14 gauge steel. The spring mounts were tacked onto the frame and everything was set onto the axle.
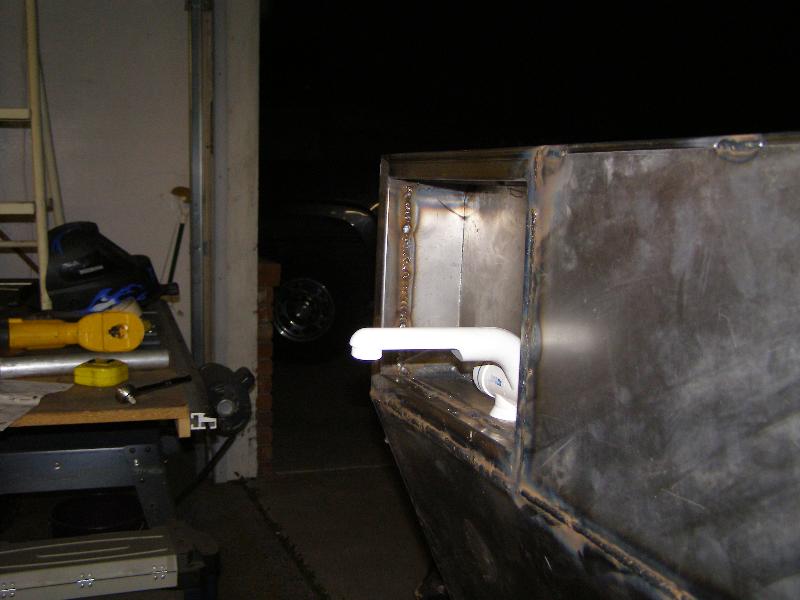
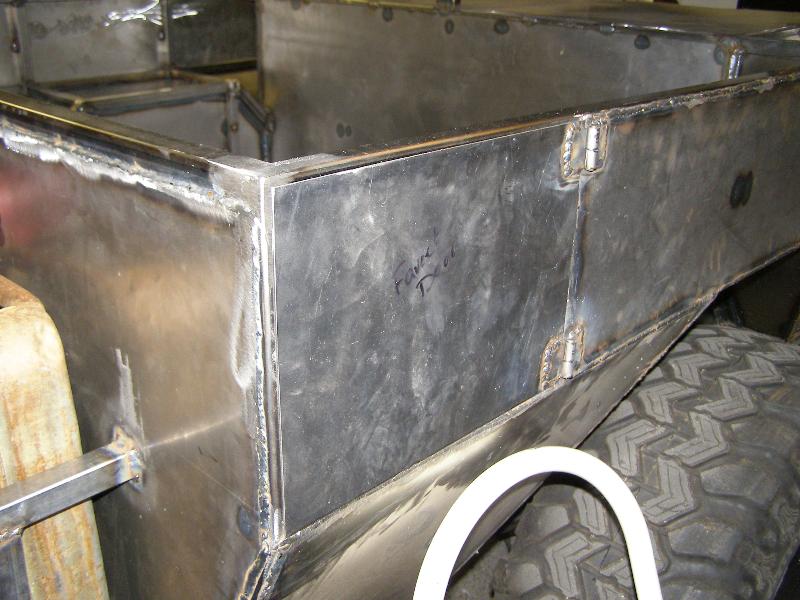
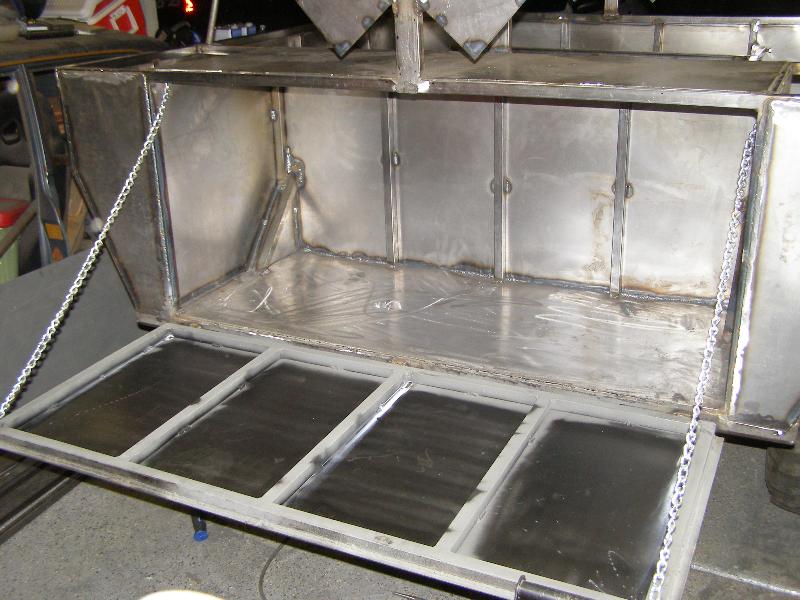
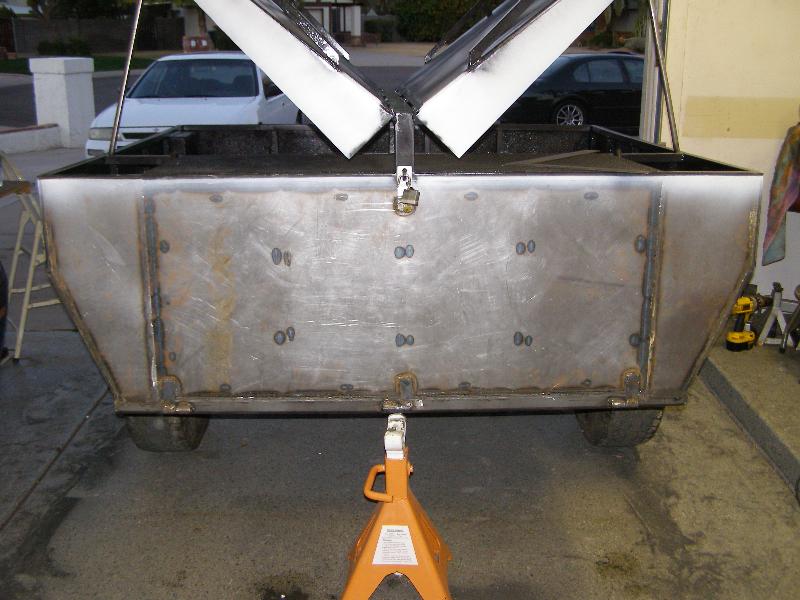
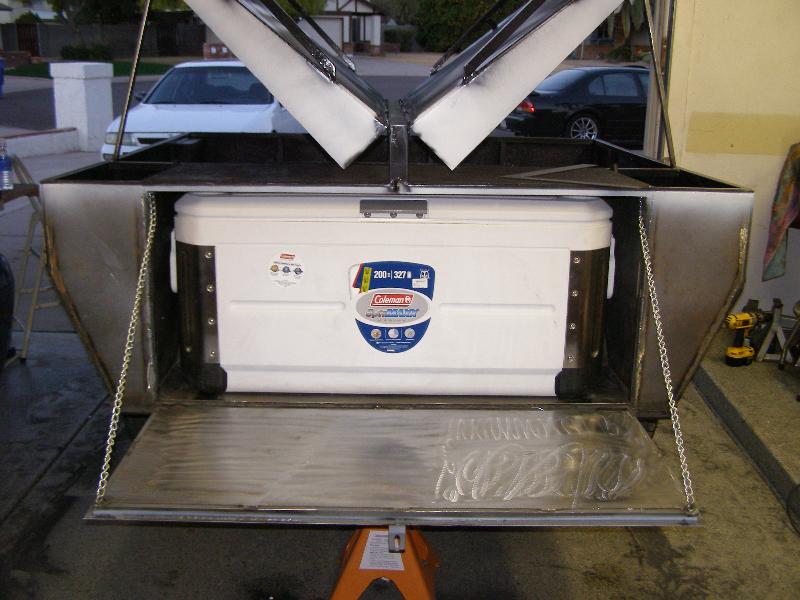
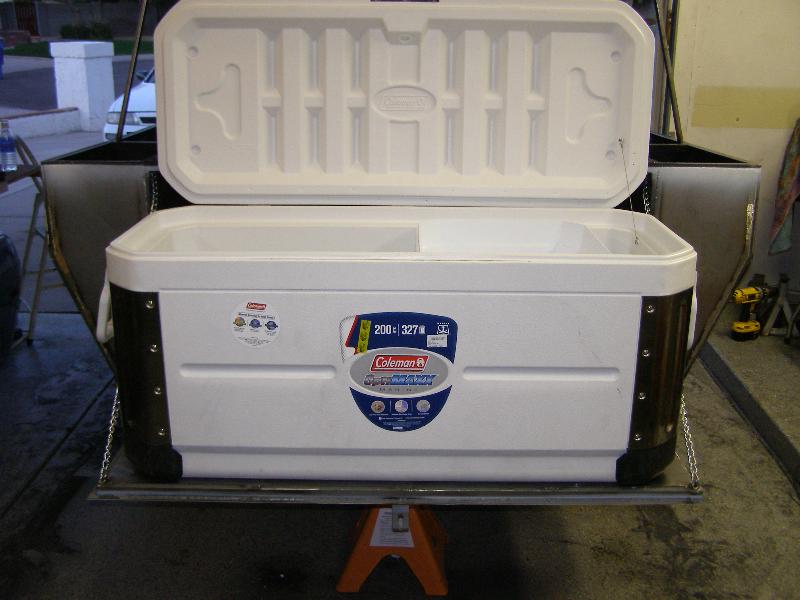
Next we started on the framework for the trailer box. The idea is to make the trailer waterproof in case we have to do any water crossings. A new GIANT marine cooler was purchased specifically for the trailer. There will be a tailgate in the back that we can slide the cooler out onto. There is still a ton of work to be done, but we made good progress in two days.
Taking shape 2/10/2008
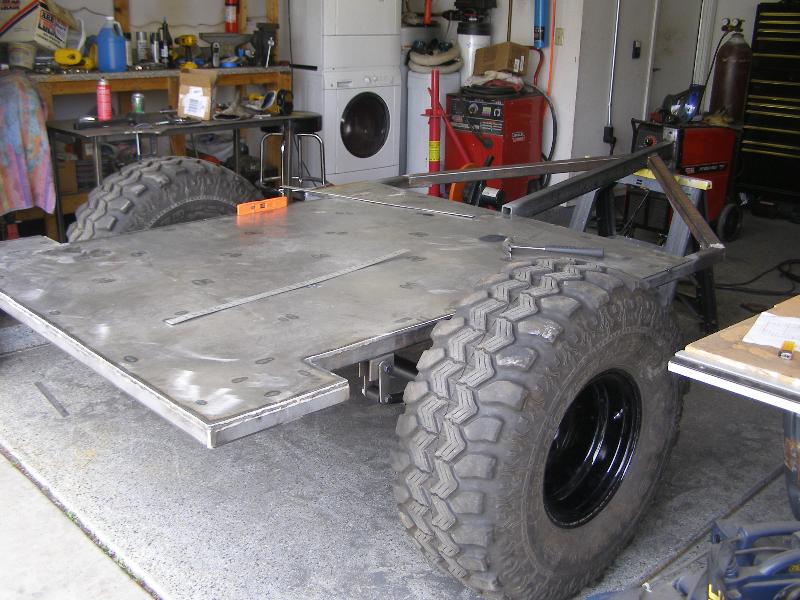
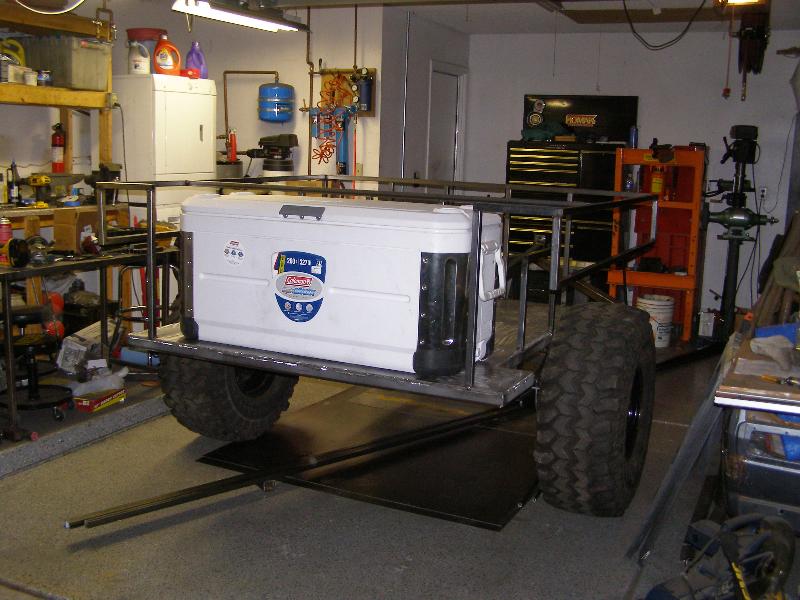
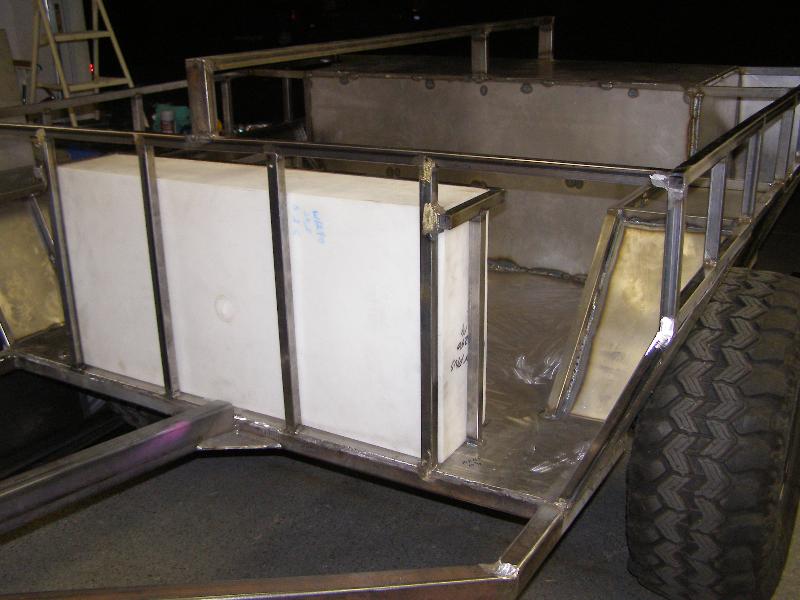
We're really running out of time to get this trailer together. Unfortunately I had some problems with my front axle on my truck and ended up swapping in the 1 ton axles earlier than planned, otherwise I would have had an extra couple months to get the trailer built. During the week I managed to get the frame for the trailers body tacked together. The 29 gallon water tank also showed up. On Saturday morning I fully welded the frame.
After the frame was welded up I started with the sheet metal. We flipped the trailer over and I welded in the wheel wells and lower panels. All the seems are fully welded so the trailer should float if we do any deep water crossings.
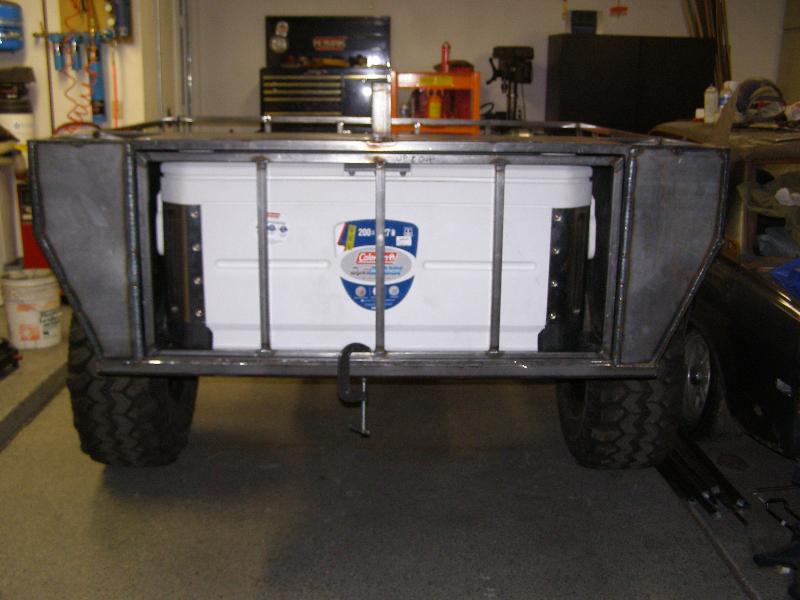
We flipped the trailer back over and enclosed the area where the ice-chest goes. We will be adding foam insulation around the ice chest to help keep the ice from melting.
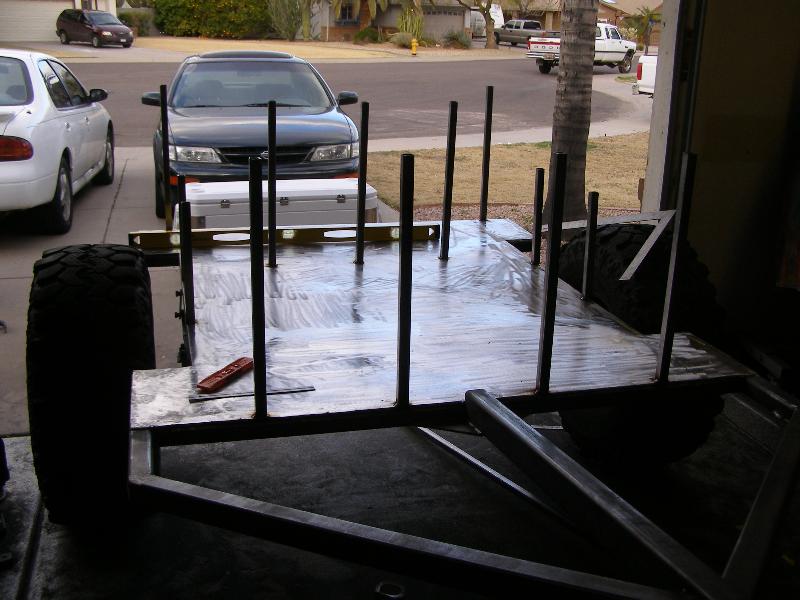
By the end of the day we had built a cage for the water tank and welded in the backbone that the top will hinge on. We also have the body panels cut for the sides and tailgate. Those will get welded together during the week.
Good progress for a Monday after work 2/11/2008
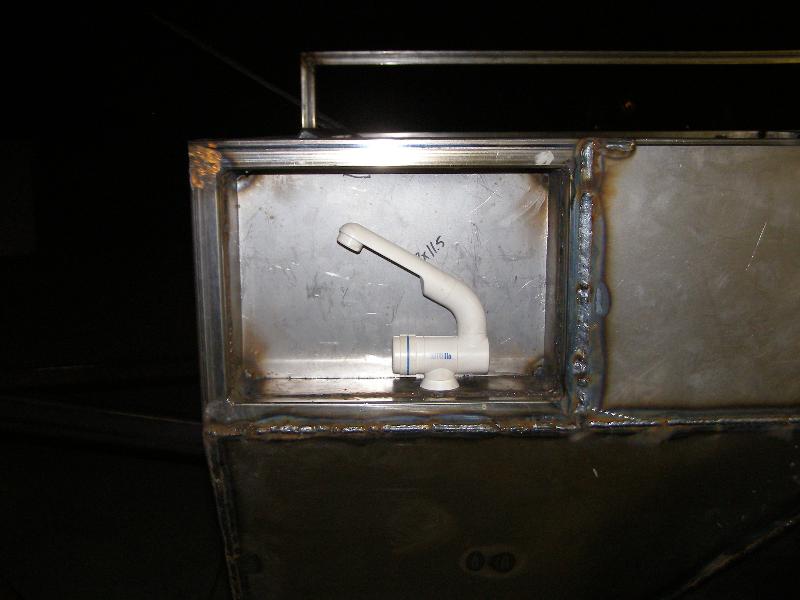
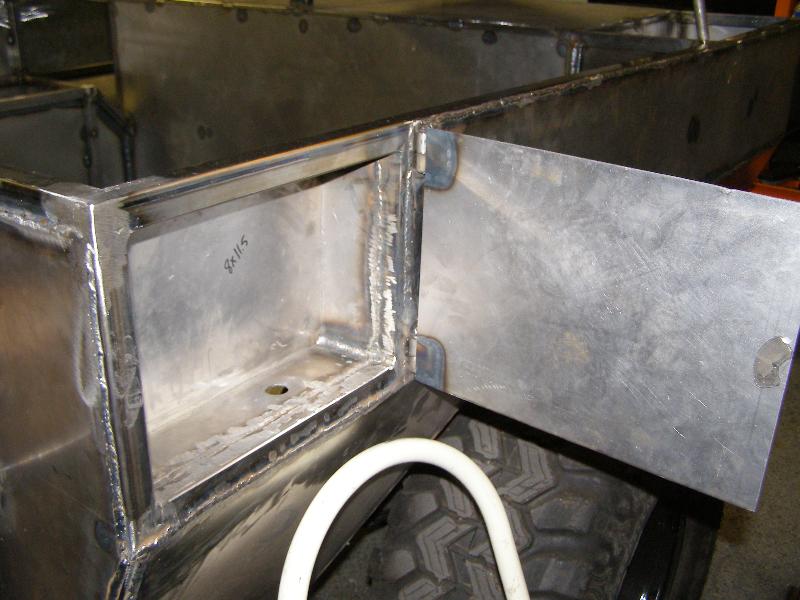
I got quite a bit done tonight. I fabricated a box to mount the faucet and water tank vent in and welded in the side panels. It looked so good so I had to update the web page. I'll make a door for the faucet later, but I wanted to get this update up tonight. It looks good with the sides done. Now I just need to skin the front, fabricate the top and skin the tailgate.
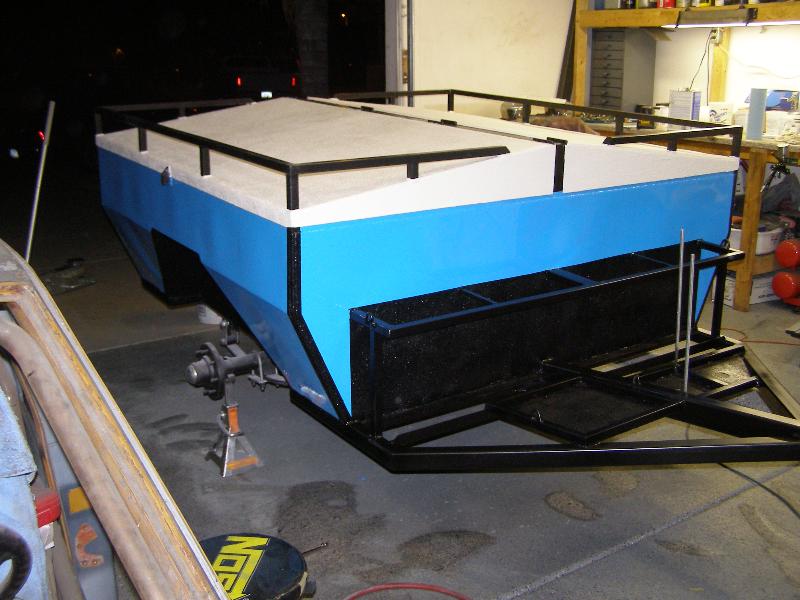
It's starting to look like a trailer now 2/13/2008
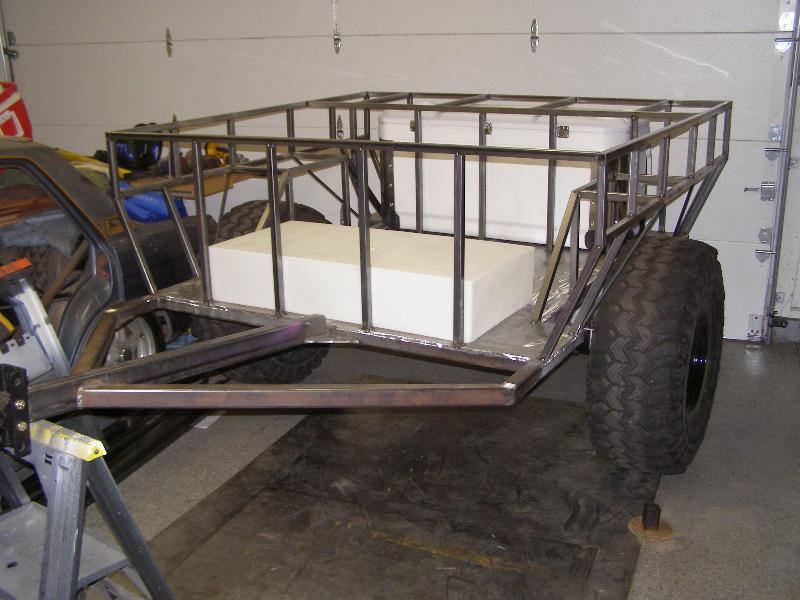
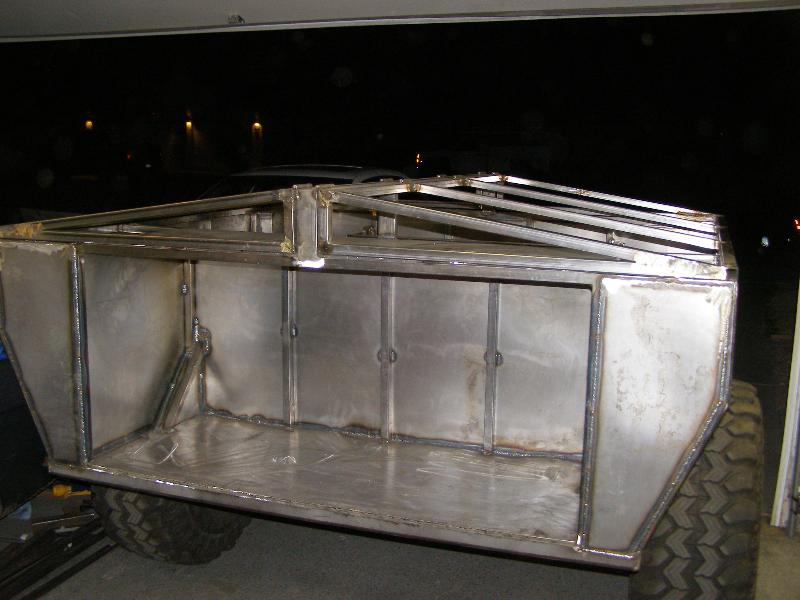
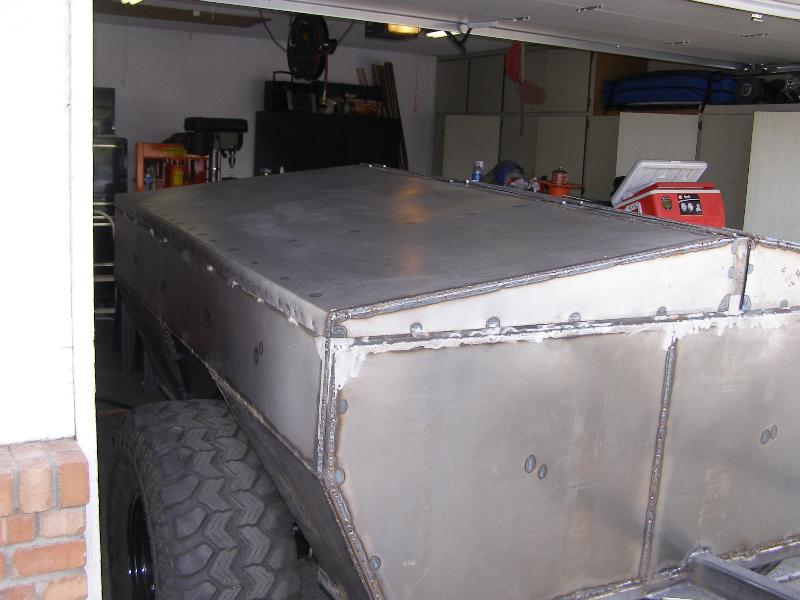
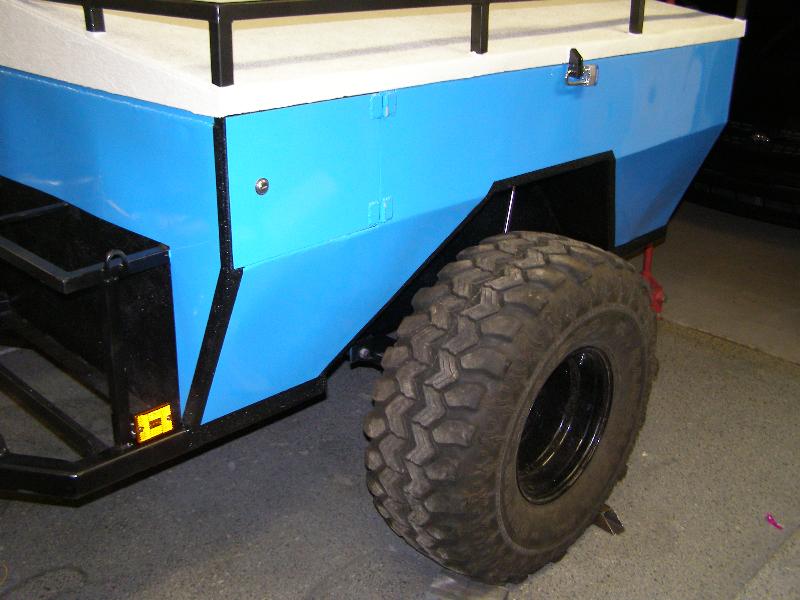
I worked a weird shift so I got off work at 4AM. I took a nap and spent the whole day in the garage working on the trailer. I started out plasma cutting the front panel and welding it on. The tub is now complete! Once I spray in some bedliner it should be watertight and float fully loaded should I do any water crossings.

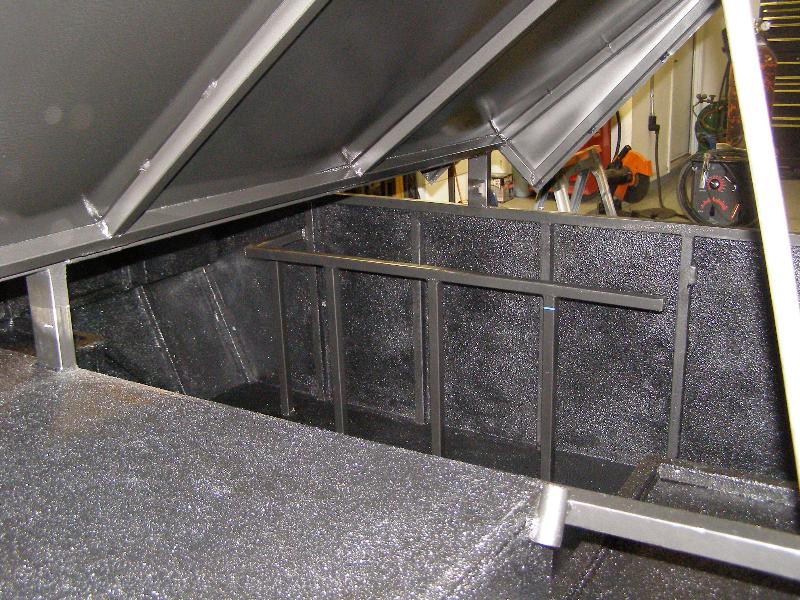
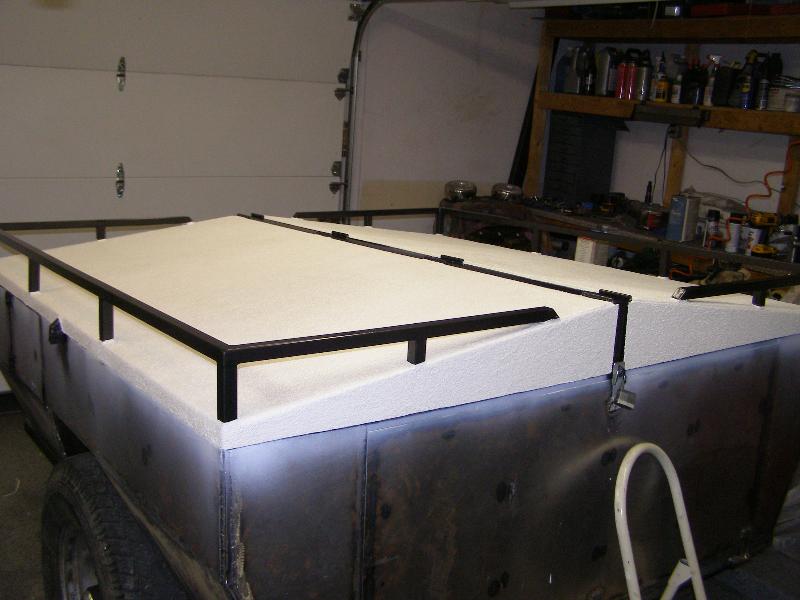
Amber worked a half day and came home to give me a hand on the trailer. We got the framework for the top welded together and attached to the trailer. We will be skinning the top and incorporating a small roof rack onto it. When it's done you will be able to flip one side all the way over onto the other, or flip them both straight up and clip them together for access to both sides at once. I need to get the top finished up and a few other things so I can start coating the trailer this weekend.

Holy crap this thing is going to kill me 2/17/2008
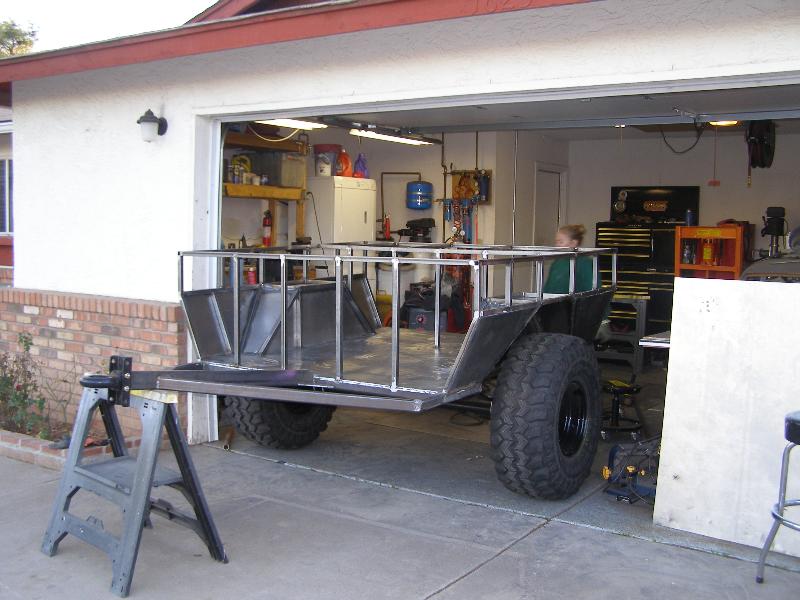
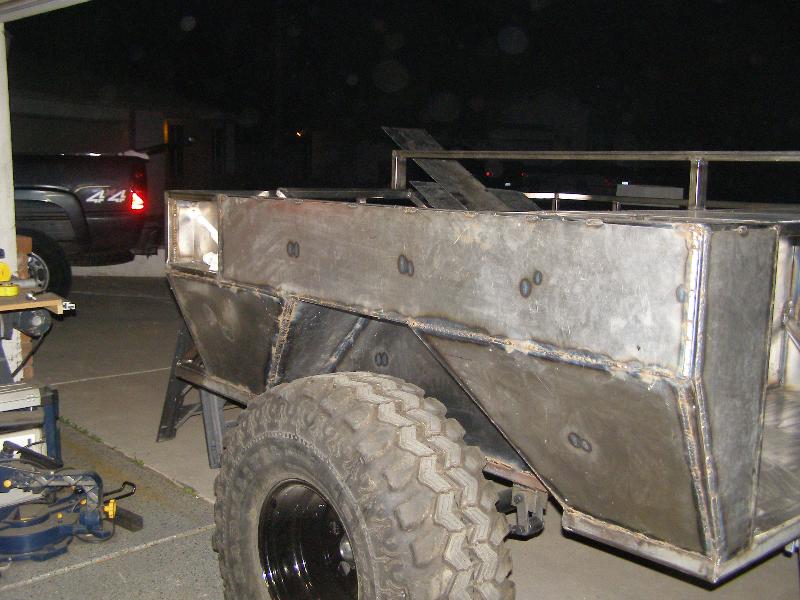
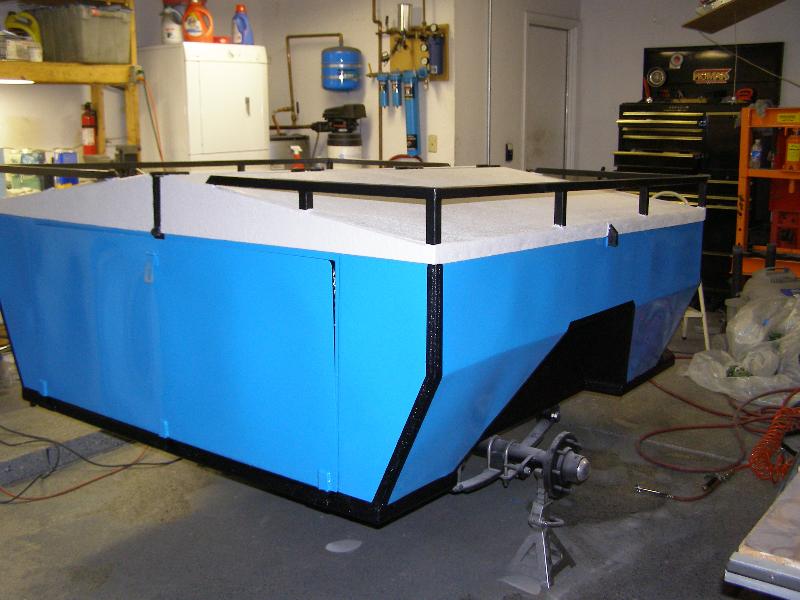
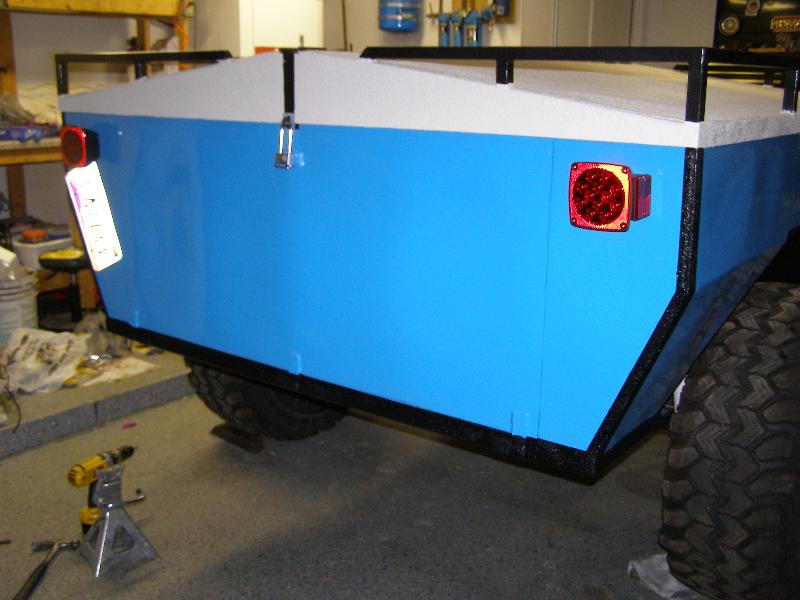
I worked on the trailer for 5 hours on Thursday night, shopped for parts Friday night (it was rainy) and spent all day Saturday and Sunday working on the trailer. The majority of the fabrication work is done, but I still need to paint/coat it and finish a few things up. We made a door for the faucet.
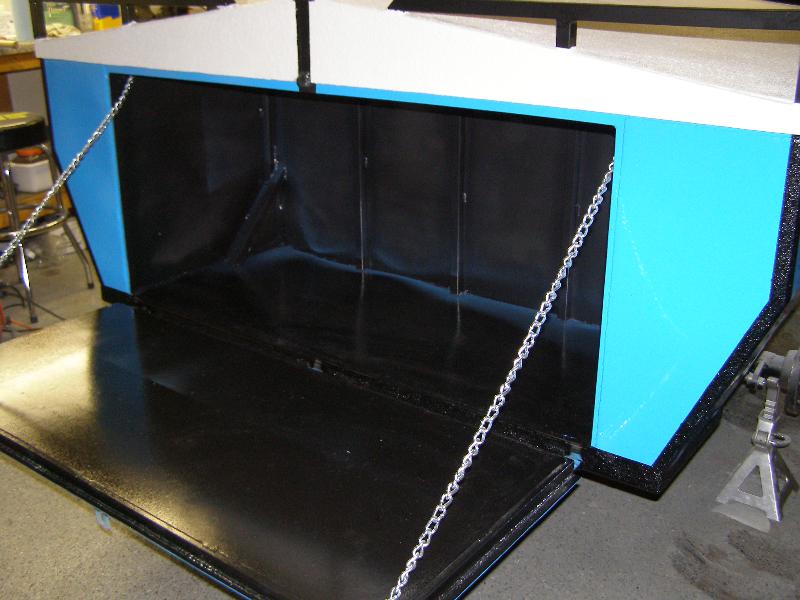
Then we skinned the top and installed the tailgate.

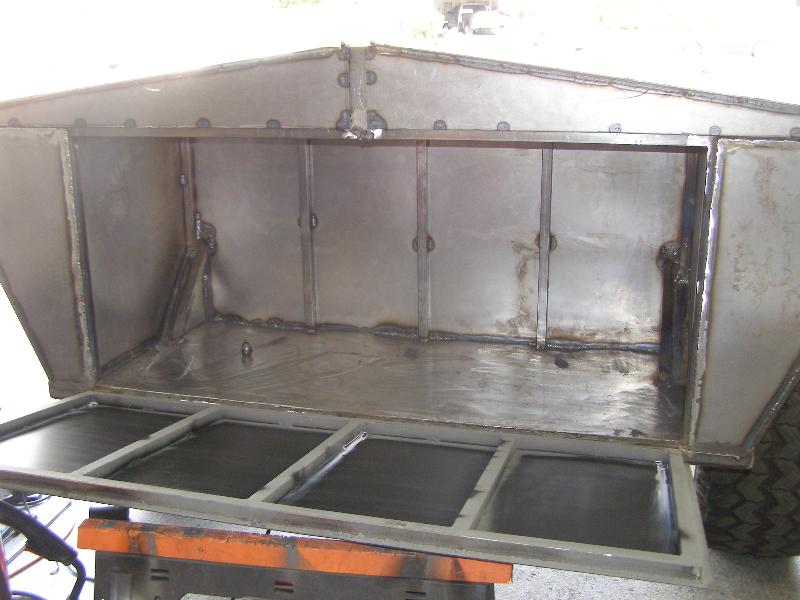
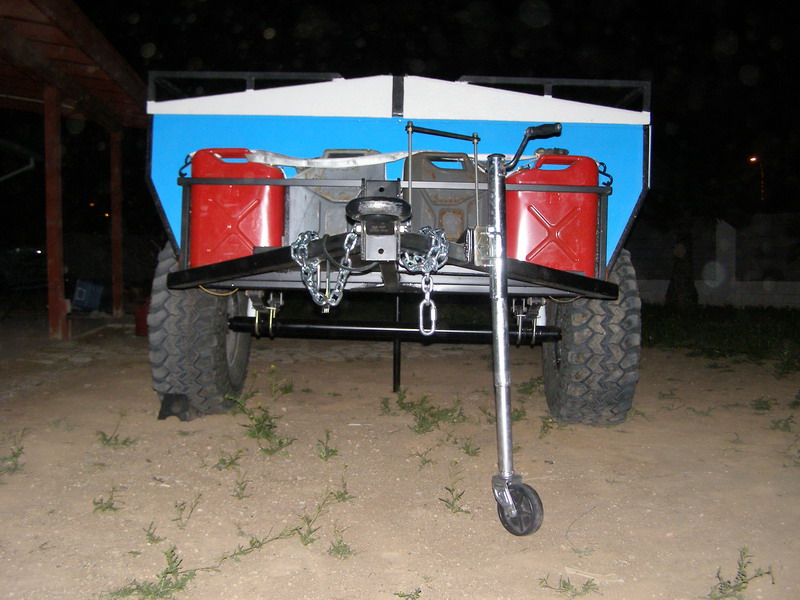
We finished up Saturday by fabricating and welding on the roof rack and a holder for 4 NATO cans on the front of the trailer.

Sunday we made/installed latches for the tops, tailgate and faucet door. Then we sanded down the inside and attempted to spray in the bedliner. The sprayer I got didn't work with the Herculiner so we ended up rolling on one coat. We'll have to get the second coat on tomorrow. Sorry, no pictures from Sundays efforts. This week I need to finish up the inside of the trailer (bedliner/paint), put bedliner on the outside of the top (white) and paint the rest of the trailer. I also need to finish up a few other details on the trailer (toilet box and propane tank holder on the front and a little more work on the gas can holder). Hopefully I'll be finished with all of that by Sunday. Then I'll just need to install and wire up the lights, do a little plumbing and get the trailer inspected/titled/registered/licensed. Sounds easy......
So much work still to be done 2/19/2008
I'm still working my ass off on this trailer every day, but the changes aren't as major anymore. Here's a couple shots of the inside of the trailer now that it's coated in bedliner and paint.

Tonight I did some more fabrication work. I made a propane tank mount, finished up the gas can mounts and made a place to strap my porta-potty to. Only a couple more small fab jobs left. Now I have to start working on getting it painted and finished up. I plan on taking it for a test run in about a week and a half.

Almost done 2/24/2008
Another weekend spent working on the trailer. I can't wait to be done. Wednesday through Friday was spent on the top. Wednesday we painted the top white, then painted the roof rack black hammered. On thursday we finished up some minor fab work and put bedliner on the top. The bedliner we bought sucked so we ended up finding white Herculiner and did two coats of that on Friday night to finish off the top.
With the top finished I took some time to finish up the tailgate. 1" foam was inserted before welding on the inner skin to help insulate the ice chest. We will be putting the 1" foam all around inside the ice chest area after it gets painted.
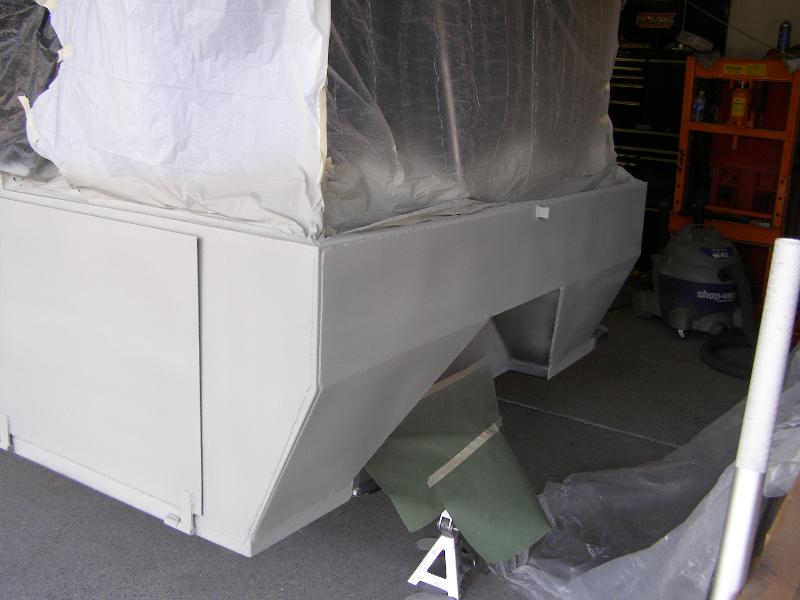
Saturday was a busy day. Masking, bodywork and primer took the majority of the day. I did take time in the afternoon to spray inside the ice chest area too but I didn't snap any pictures before I masked it off.
Sunday morning we sanded the primer and sprayed the top coat. I painted it to match the K5, I think it looks good.

After we let the paint dry for a few hours we masked it off and sprayed the rest of the frame, fender wells and corners with black. Once that tacked up we went over most of it with black Herculiner. We pulled the tape off and snapped a few pictures. We're finally done with painting!
Here's a shot of the painted ice chest area with all the tape/paper removed. We got some overspray in there so I'll have to touch that up later. Now we need to do wiring, install the lights, get it titled, registered and licensed and do the plumbing. Hopefully we'll finish that up this week so we can take it on a test run next weekend.
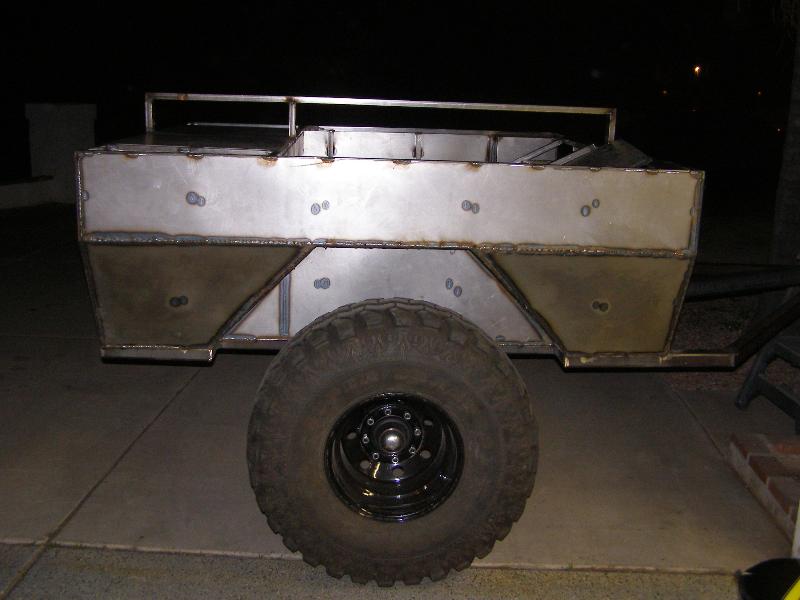
It's legal now! 2/27/2008
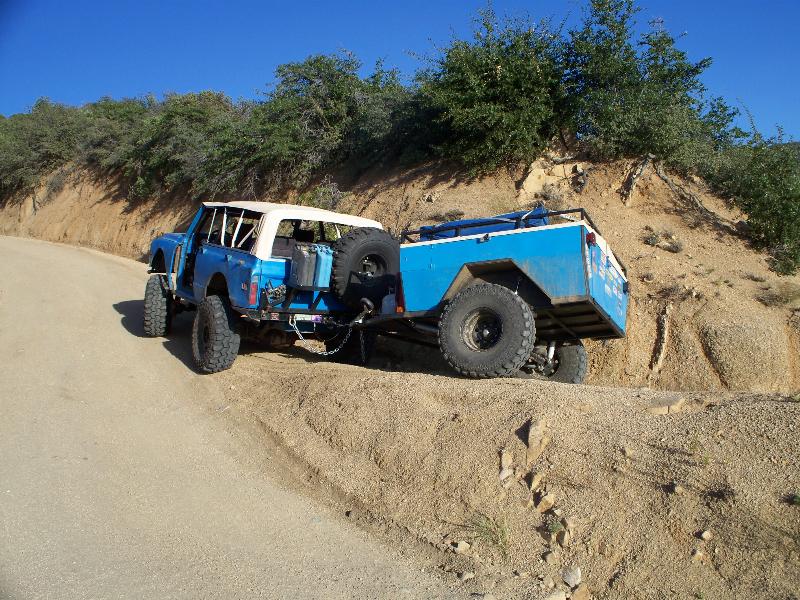
I took it to the DMV today and got it inspected, titled, registered and licensed. I had flipped the axle and put smaller tires on it to take it to the DMV. Once we got it home we flipped the axle back over, installed the shocks and 35's. You can see the LED trailer lights in the pictures too. We managed to get the wiring and latches finished up last night so I could take it to the DMV. Tonight we installed the license plate, and installed weather stripping on all the openings.
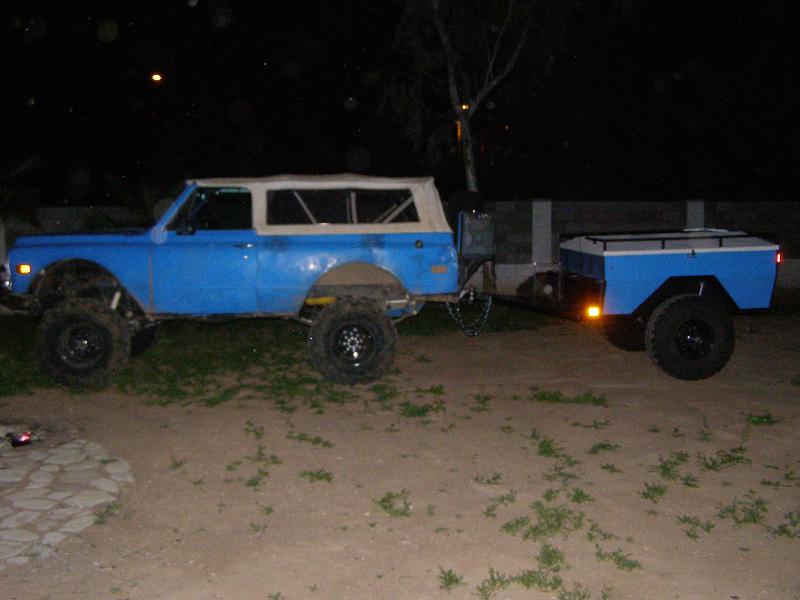
It's a terrible picture because it was dark out and I had to be far away to get the whole thing in frame, but here's the trailer hooked up to the beast. I still have a few things to finish up before the test run Saturday. Plumbing, a trailer jack, insulation for the ice chest "trunk" and a few other minor things. I also still need to wire the K5 for the trailer lights.
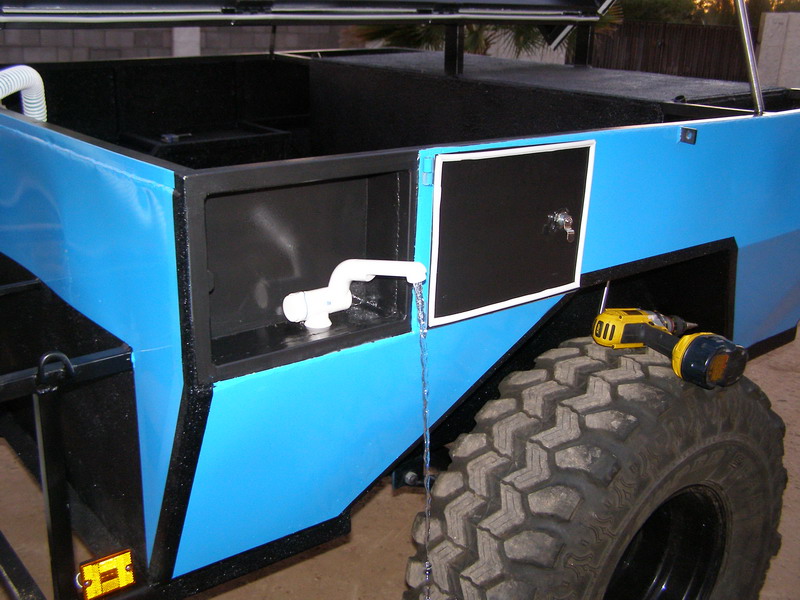
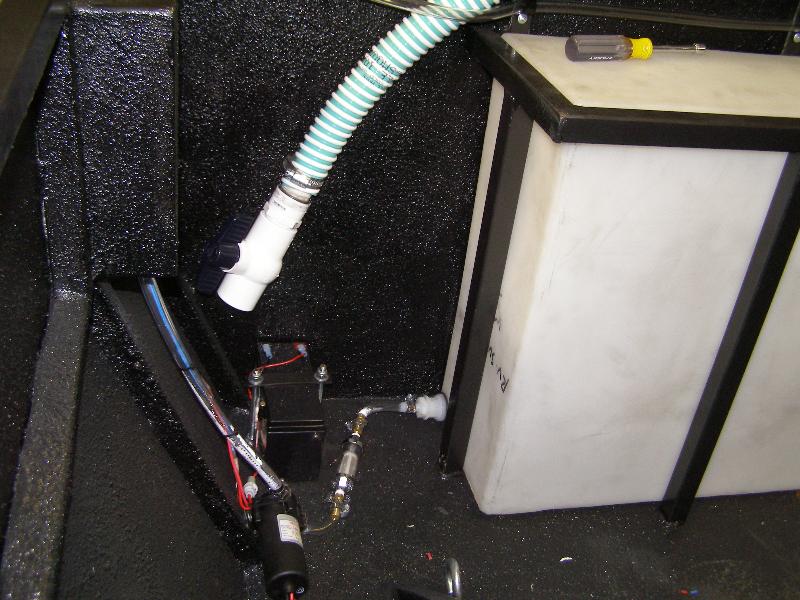
Running water 2/28/2008
Amber and I were both pretty tired tonight. We didn't get much done but we did manage to get the plumbing figured out and tested out the system. We still have to mount the battery and do a couple minor fixes but the plumbing is done for the most part.
It's done! 3/2/2008
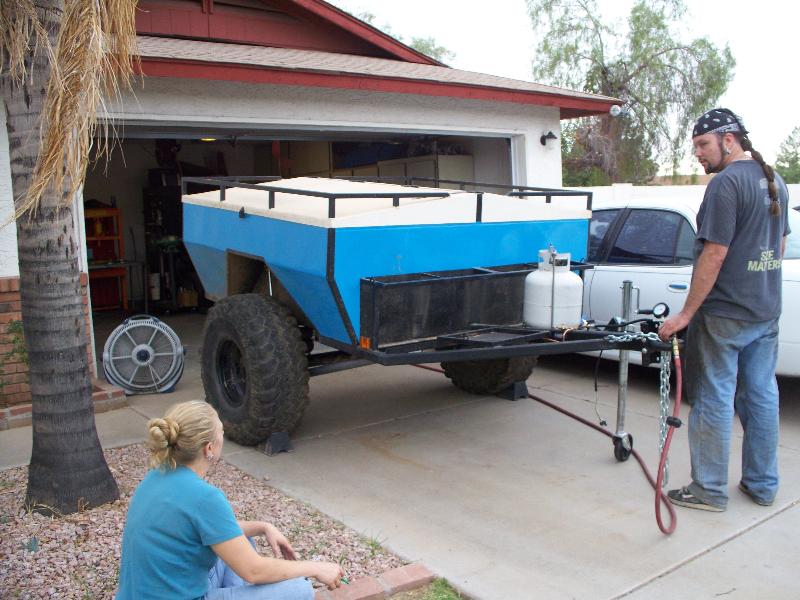
After only 4 weeks the trailer is done! I'm sure I'll be changing some of the stuff later, but aside from a repair I have to make after the run it's done. On Friday/Saturday we lined the "trunk" with foam, wired and plumbed the water pump and put everything together. The last picture is for a running joke from Pirate 4x4.


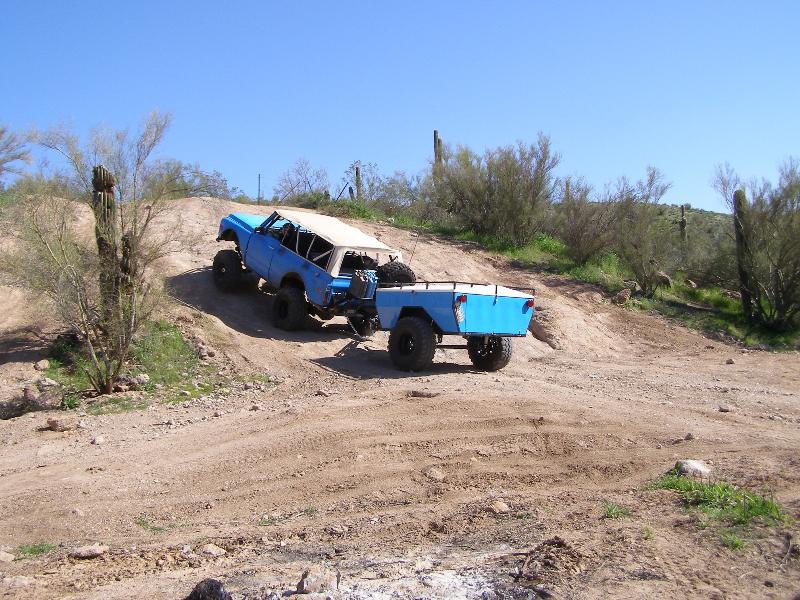
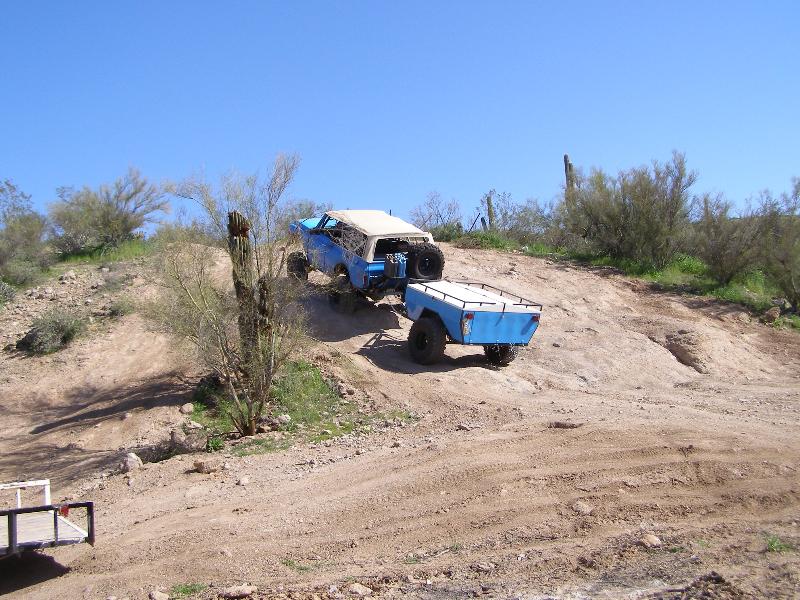
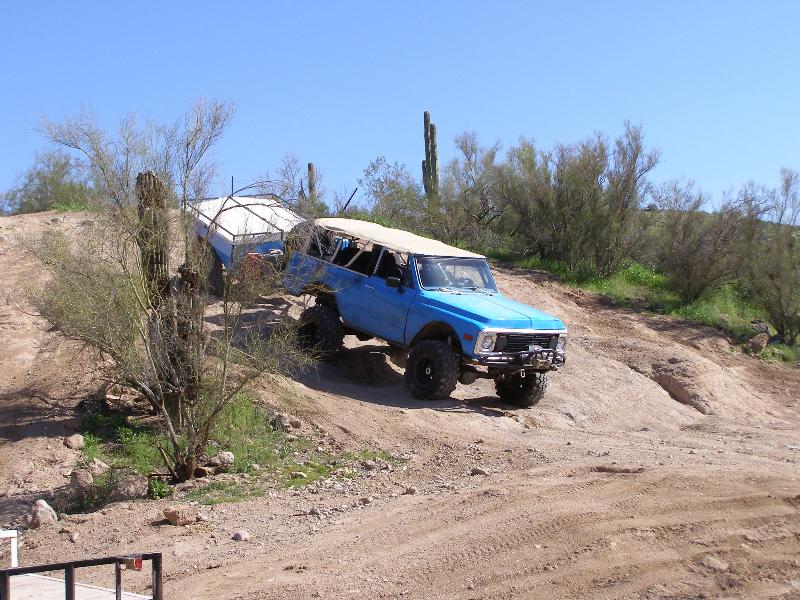
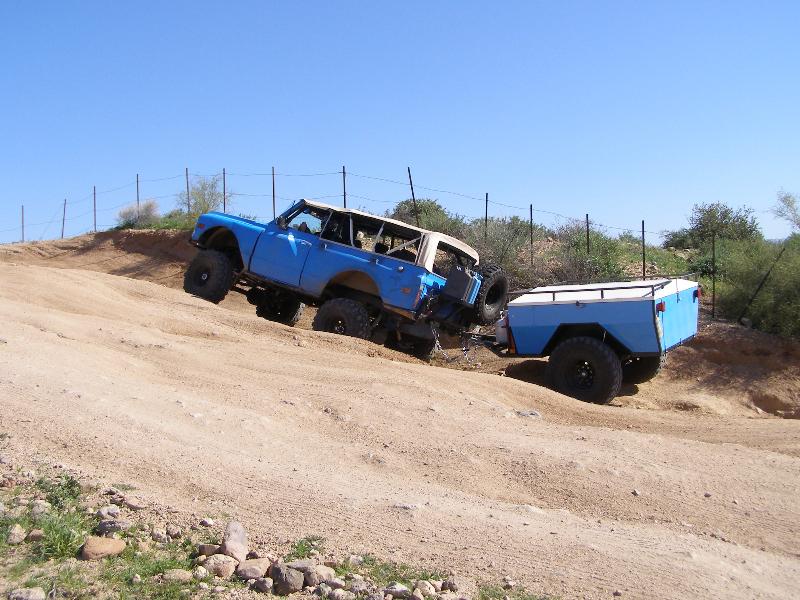
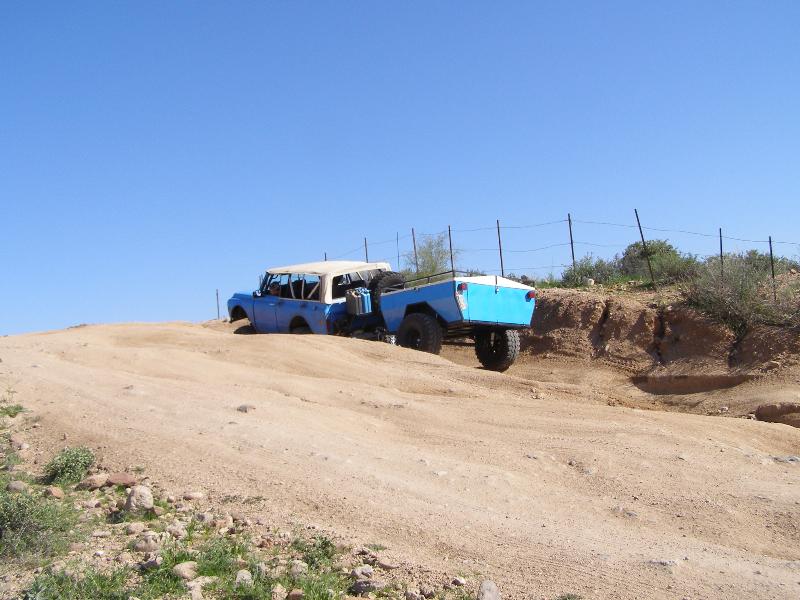
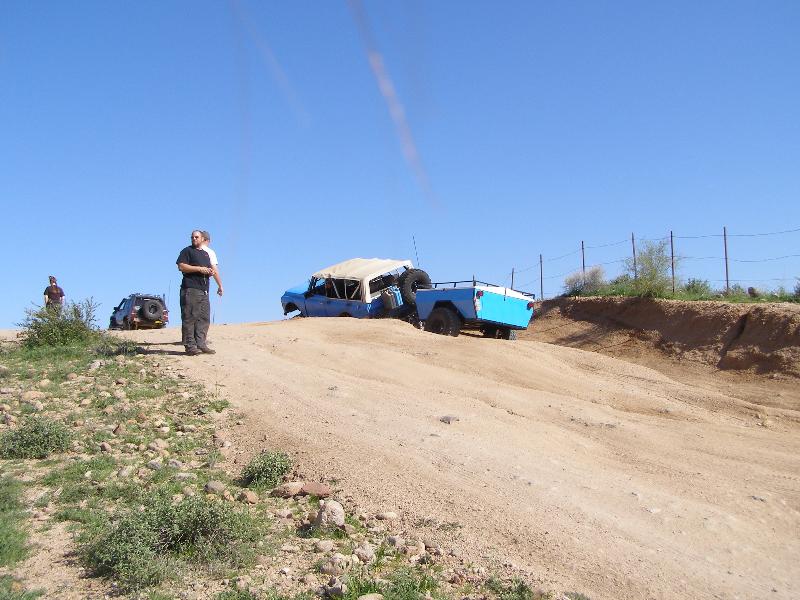
We met some of the guys from Nissan 4 Wheelers out at the lake for a test run on Saturday afternoon. We filled the ice chest with water, filled the water tank and filled all 4 gas cans. Fully loaded weight when we go on the run will probably be 300-400lbs more, but this was a good test. The trailer towed great and didn't seem to slow me down too much off-road.
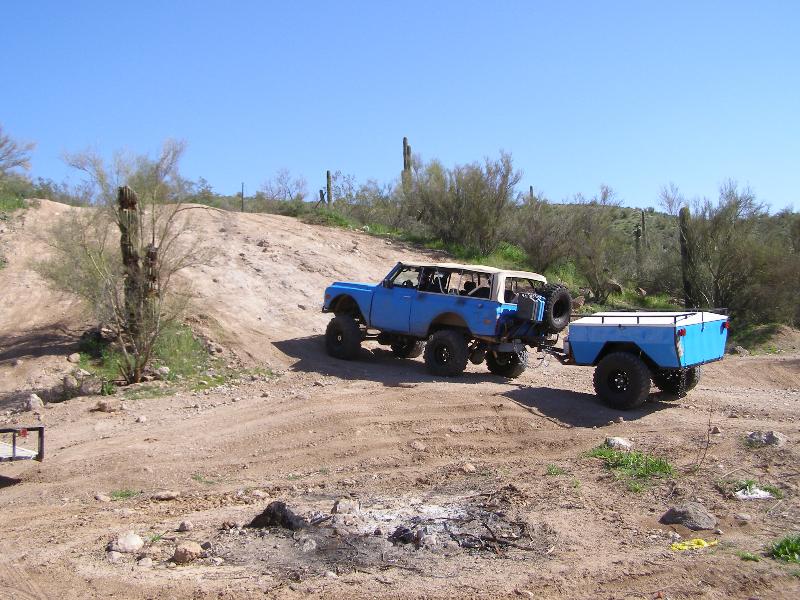

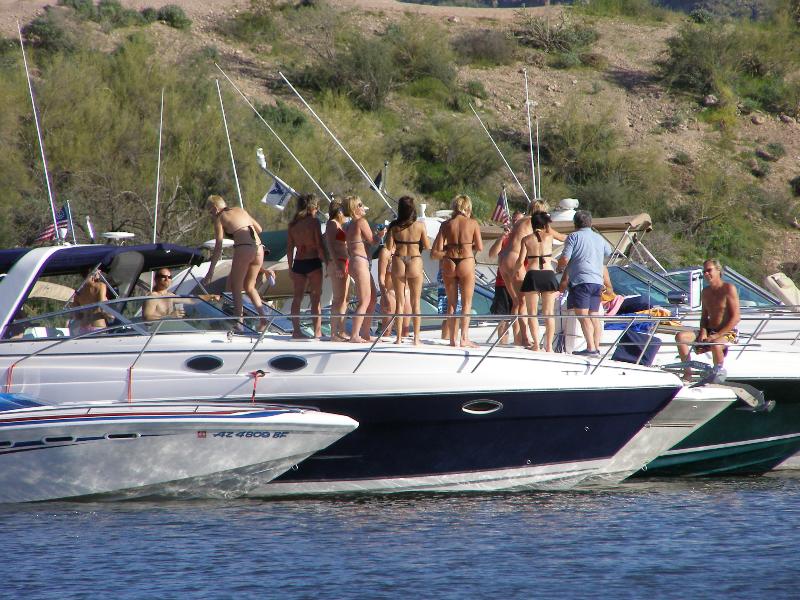
We stopped at the beach in cove 1 and hung out for a couple hours. There was a few million dollars worth of boats tied together in the cove. I snapped some pictures when they were having their "bikini contest". It looked good from the beach, but the zoom in shots show a lot of high mileage ladies. Disappointing to say the least.
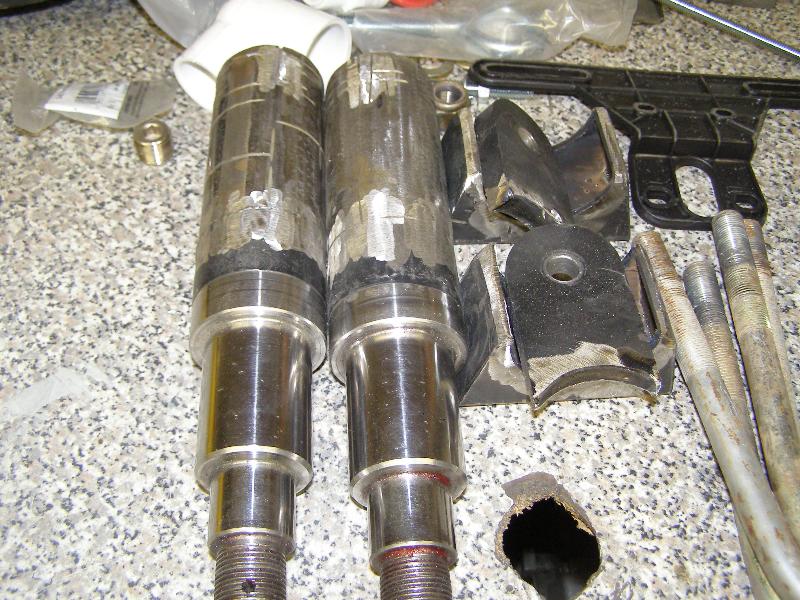
Well I found the weak point in the trailer design. I had a tough time finding tubing that would fit over the 2.5" spindles I bought when I built the axle. We ended up with 2.5" - 1/8" wall welded tubing. That was a mistake. It bent pretty bad on the way back out to the pavement. I had to remove the shock on the passenger side because the tire was rubbing it. It still towed ok and made it home in one piece (we drained out all the water after we bent the axle and took it easy all the way home).
Sunday we pulled the axle back out and I "deconstructed" it. I salvaged the spindles, shock mounts and spring perches. Now we have to figure out where to get some stronger/thicker tubing and get a new axle built by next weekend.
Axle 2.0 3/3/2008
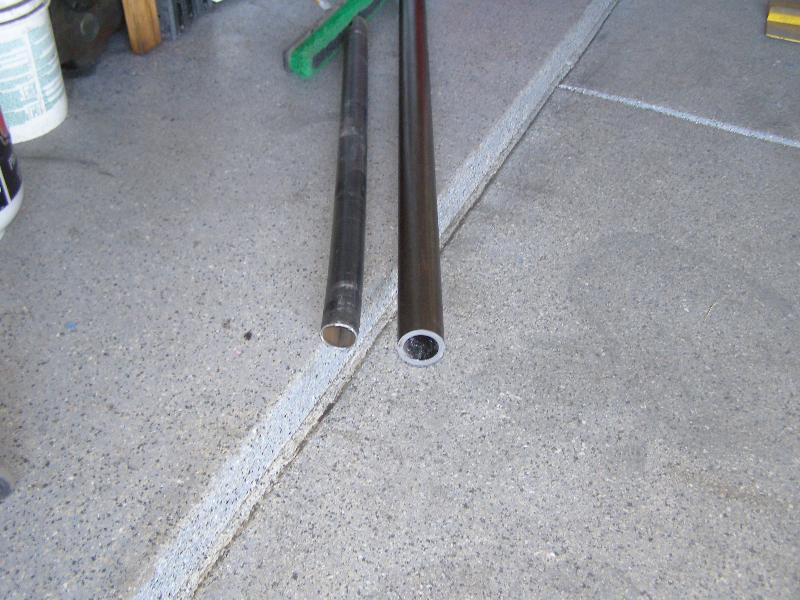
So I looked around to find tubing with a 2.25" ID. The only thing I could find other than what we had already determined to be too weak was 3" 3/8 wall DOM. Talk about a major upgrade. This is probably at least 5 times stronger than the old tube.
At least I don't have to ever worry about bending it again. I found out that the spindles were slightly larger than 2.25" OD. I wish I had a lathe, instead it took about an hour and a half with an angle grinder and sanding disk to get them to fit in the tube. Once I had those in they were fully welded and I welded the spring perches and shock mounts back on. Even though it's only .5" bigger diameter it looks MASSIVE now. Tomorrow we'll fab up new spring plates and get this thing back under the trailer where it belongs.

It's done! Again! 3/4/2008
Tonight we fabricated some new spring plates, cut down some u-bolts we had laying around from my old half ton axles and put the trailer back together again. I just have a few minor things to take care of, but it's pretty much ready to go for AZ Run 8.
Upgrades 10/6/2008
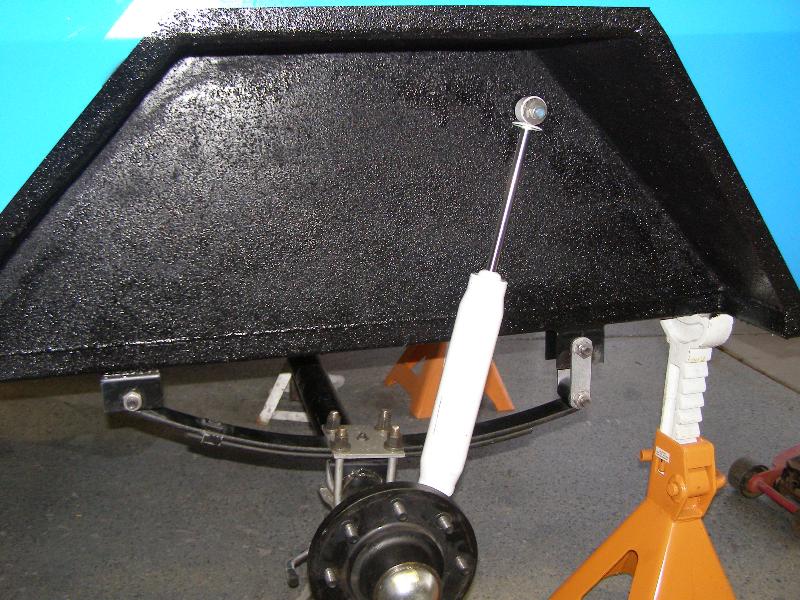
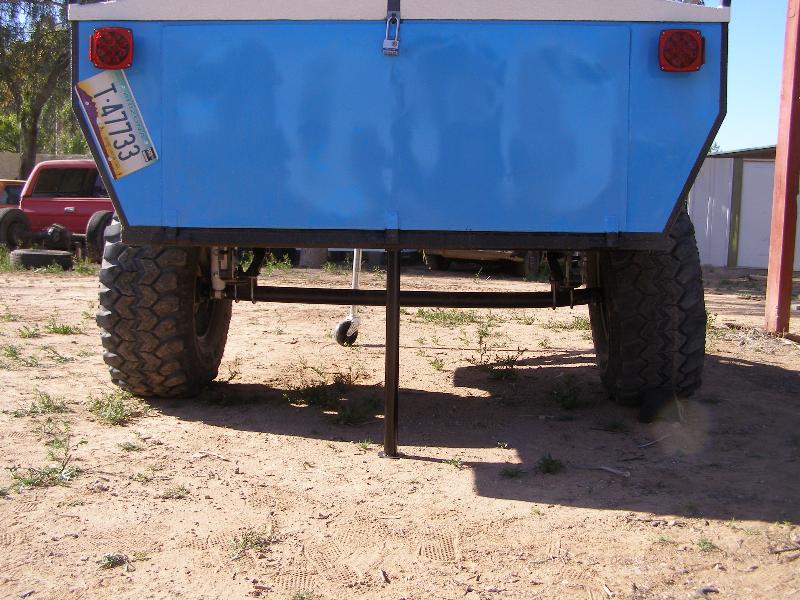
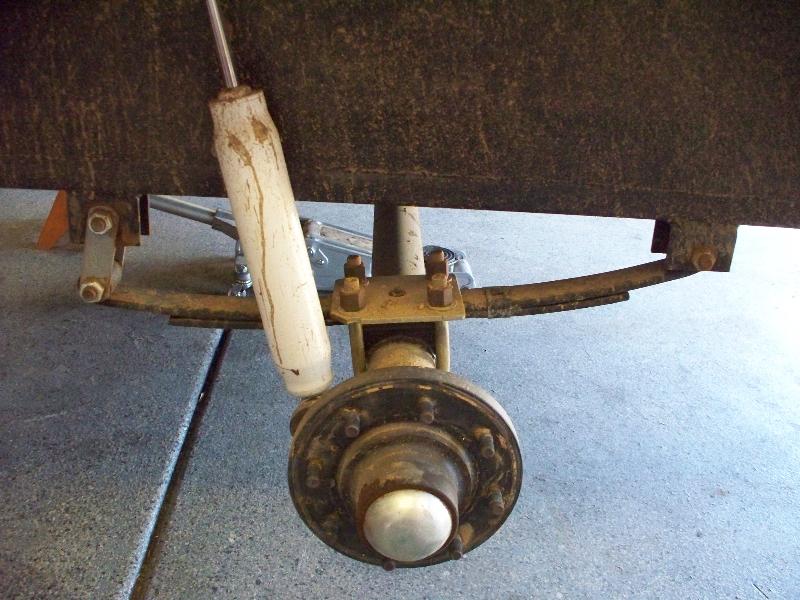
The AZ Run showed some weaknesses in the design. The suspension was way too stiff and this caused a lot of damage to the items in the ice chest at the rear of the trailer. It was so stiff that I bent both leaf springs even though they were rated for more than the trailer weighed. This is a shot of the old suspension.
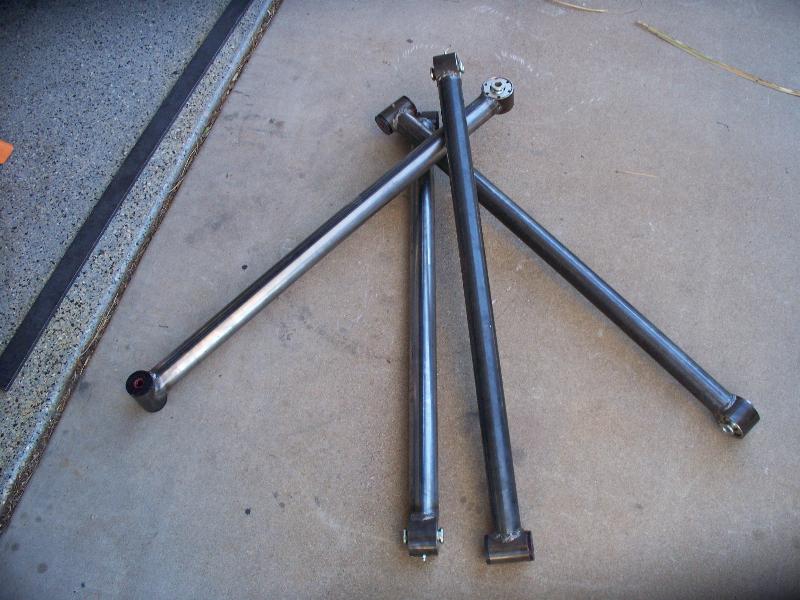
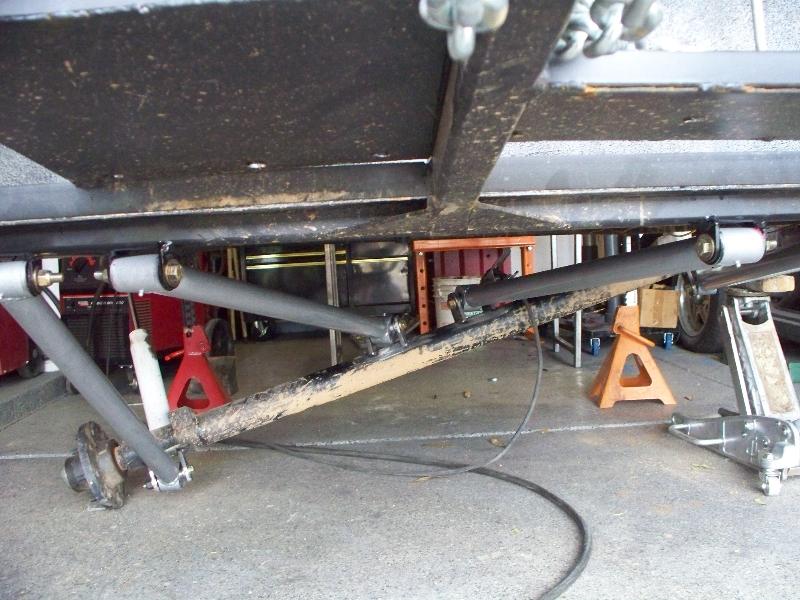
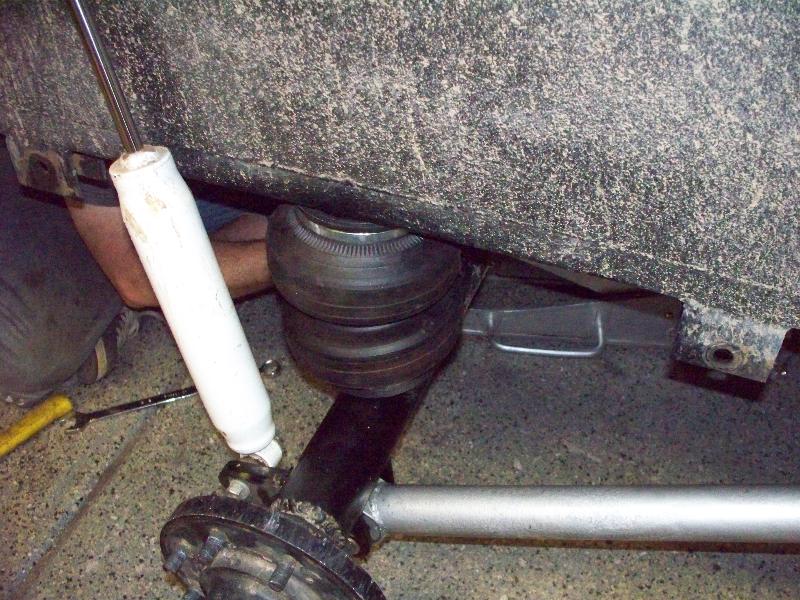
I decided to go with an airbag suspension so I could adjust the height with the load and so that when we were in camp I could lower it to make it easier to get into. Since I was going to be dragging this behind my rock crawler I thought it would be cool to do a double triangulated 4-link to position the axle. I used 2" and 1-7/8" .120 wall ERW tubing for the links with DIY4X poly bushings at the front and Ballistic Fabrication Ballistic Joints at the rear. When I get more time I'll add some angle iron to the bottom of the lower links to protect them from rocks.

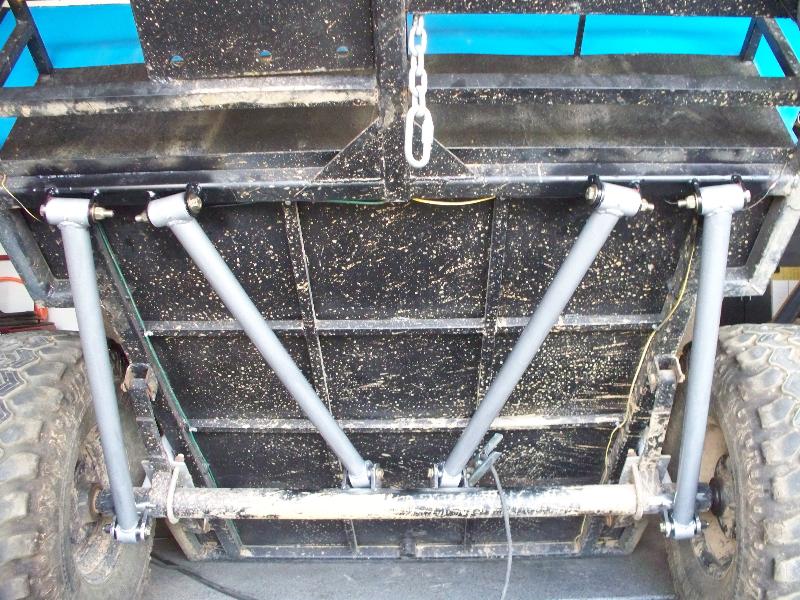
I picked up a couple Universal Air Suspension double convoluted bags on e-bay and plumbed them to a Shrader valve on the tongue of the trailer. I put a valve to isolate the two sides so the air doesn't flow between the bags on side-hills. This also allows me to tip the trailer which will be nice for draining the water tank.
The final thing I added was a bottle opener near the tailgate for easy access.

Upgrades 10/6/2008
I ended up putting some longer shocks on the trailer to get full range of motion on the bags, now it gets the full 10" of travel.
We took it on a test run up 4 peaks for a 3 night camping trip. The new suspension worked great, much softer than the old springs.
Upgrades 12/28/2008
We pre-ran some of the trails we'll be doing on the AZ run and I decided that it would be really nice to have brakes for the downhill sections. The brakes are massive because I had to run 12" drums to keep the 8-lug pattern. The shocks had to be relocated to clear the massive drums.

3-Axis Hitch 3/6/2009
I finally got around to building the 3 axis hitch so I could get rid of the noisy pintle. I started out with a 5200 lb trailer hub and spindle and a couple poly bushings.

The wheel flange was cut off of the hub and a mounting bracket was welded on. One of the poly bushings got welded to the receiver end of the hitch and the other was welded to the spindle then a "shackle" was fabricated to connect the two halves of the hitch then it was painted and assembled. Now I just need to test it out on the trail.